Disclaimer: This post contains affiliate links. If you make any purchases via these links, I will receive a small percentage. For more information, please click here.
When you’re a child, there’s nothing more disappointing than getting some exciting new toy, only to find that it didn’t come with any batteries, they’re some obscure size you’d never have any spares of anyway and of course, it’s holiday season so you can’t just pop down to the shops either.
The grown-up version of this is having hauled some hefty piece of crafting equipment back home, precariously tied to your car, only to find you’ve forgotten some nut, bolt or screw that means you can’t fully assemble it immediately.
Luckily, particularly when it comes to weaving, necessity is the mother of invention and one of the true joys of adulthood is unfettered access to DIY stores and power tools. Plus, how often is it what you get to do is essentially crafting with a very heavy hammer?
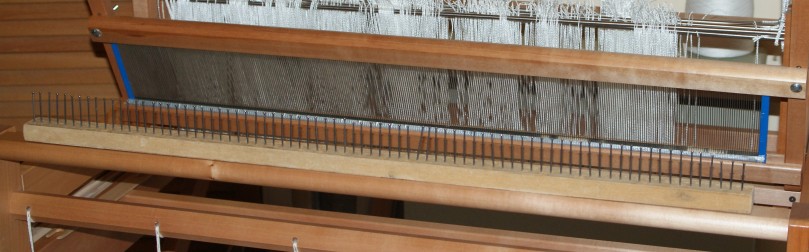
I am now the very proud owner of an Ashford 8-shaft table loom which has done a grand job of significantly reducing my available floor space and confirming that between the wheel, the sewing machine, the boxes of thread, the felting roller… etc. etc. I have indeed gone off the deep end of a crafting problem.
When I did try to warp up though, I realised that I’d managed to forget to get a raddle with the loom. I somewhat stupidly assumed they came as standard with Ashford looms, particularly as they are plastered all over their video and booklet instruction guides on ‘How to Weave on Your Ashford Loom (if you bought the extras we didn’t tell you about)’. There are ways of warping up without a raddle so why not just include those in the guide instead?
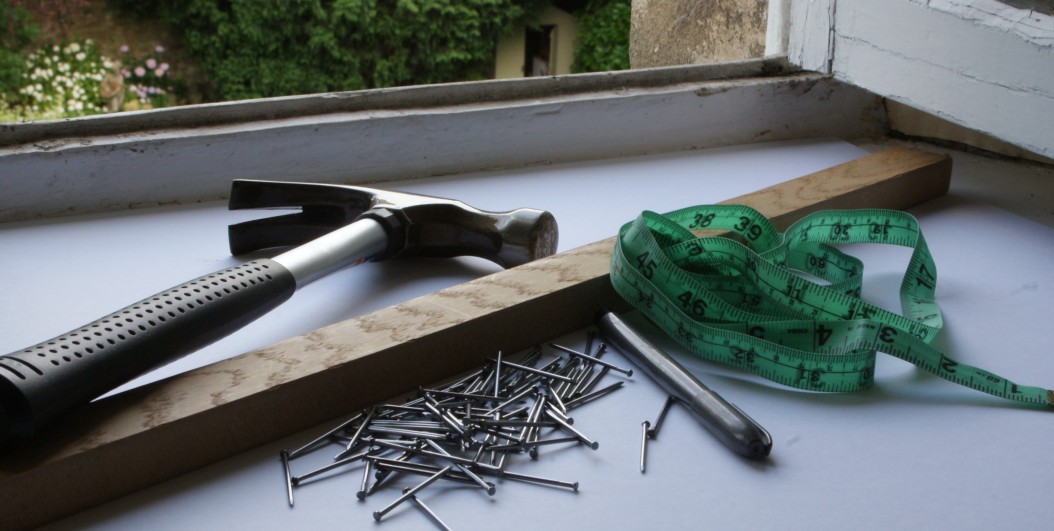
Thankfully, making a raddle is really easy if you’re willing to accept something that doesn’t necessarily look like a work of art.All they essentially are is a bit of wood, with nails at even divisions that help keep the tension on the warp more even when you’re winding it on.
If you’re feeling that all of this looks like too much effort for you, Handweaver’s Studio does offer their own brand nail raddles and ones with plastic separators for a much more reasonable price than the Ashford brand ones. However, it might be a case of ‘you get what you pay for’ as their cheap stick shuttles are perfectly functional but a bit of sanding wouldn’t have gone amiss.
You will need:
Nails or panel pins
Hammer
Length of wood roughly equal to the weaving width of your loom
Ruler
Marker Pen
The wood needs to be thick enough that you can get the nails far enough in so they will hold securely. The piece of wood here is 80 cm long by 30 cm wide and 20 cm deep and 40 mm panel pins were easily long enough. I would recommend nails over panel pins unless you’re using very soft wood, just be careful they don’t have rough edges that might snag threads.
Quilting rulers are actually perfect measuring tools for the job if you have one that is long enough as it’s easy to keep your markings straight and they tend to be sub-divided into very useful divisions. If you’re like me and prefer working in centimetres, Craftovator have a great range of quilting rulers in centimetres.
Making the Raddle
Measure the length of your wood and mark the centre

Decide what size divisions you want on your raddle. I decided to have two staggered rows of nails, so I could have every 0.5 cm if I wanted as I tend to prefer working with finer threads. (Each nail in one row is 1 cm apart.) 0.5 “ is quite a common choice but think about what you enjoy working with and choose accordingly, you can always add or remove nails later if necessary.
From the centre, mark each division for the nails. Just a dot will do as a guide.

The next step will vary a little depending on what wood you’ve picked. If you’ve been sensible and gone for a nice, soft wood, like ply wood, you can just get to work with the hammer and get all those nails in along the markings.
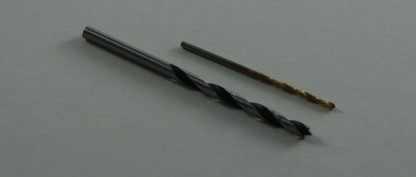
If, like me, you have some MDF, you will quickly discover that hand nailing MDF is not what you want to do. This is where I strongly recommend digging out your beloved hand drill and drilling guide holes for each of the nails. My pins were about 1.5 mm diameter, so 1.2 mm holes made the pins easy to get in. Health and safety warning, if you’re sawing or doing anything with MDF that will product any dust, use a dust mask and do it in a well-ventilated area. It’s not the nicest stuff.

Most hand drill sets (including the Matika drilland set
) don’t come with fine enough drill bits for jobs like this so if you’re being organised, you might want to add some fine drill bits to the shopping list. The Rolson Micro
sets are very affordable and just about did the job, although only the 1.0 mm + bits will fit the standard Matika chuck, and a little precariously at that. Do be gentle though and keep the drill straight, particularly when removing it as it doesn’t take much to snap them.
If you aren’t sat there smugly with your already hammered plywood, just whack all your nails in. I was impatient to get on with some weaving so I decided to just put in one row for now and save the rest for later.

Wiggle the nails around and hammer in any loose ones more securely and you’re ready to get some warp threads in!

Good luck with your raddle! A weaver who can do even minor woodcraft is a blessed weaver ❤ I warp from the front myself and don't use a raddle, so I will be following your warping journey with interest. Especially because I just wove off the end of a 14 metre warp and am pondering what to warp up next!
LikeLiked by 1 person
I’m sure I’m going to be there with a hacksaw and sander soon… What are your opinions on the front/back warp thing? Oooh, are there going to be photos of this soon?
LikeLiked by 1 person
There will be pictures for sure! I prefer warping from the front but either way is a huge pain to do by yourself on a loom as big as mine is. I really sweat over it! I’ll have to see if I can bribe someone into passing me the threads…
LikeLike
My kind of crafter, my bench drill would have drilled those holes in seconds. I bought it to drill holes in dominos back in my mixed media days 🙂
LikeLike
I am looking forward to the day when I can have a proper workshop, with bench drills and lathes and decent cutting tools… Power tools make everything more fun.
LikeLike
My drill cost £40 from b&q, cheaper than a night out 🙂
LikeLiked by 1 person
I almost died laughing when I read the start of your post. I just received my Ashford 24″ 8 shaft loom today….and NO RADDLE! The dealer told me it comes with everything you need to start weaving, so I assumed it did. Silly me, I somehow thought that also included a warping frame. I guess I’ll have to make one of those, too! Thanks for these raddle instructions!
LikeLiked by 1 person
Hope it helps and good luck! I shouldn’t advocate using your newly-made raddle for giving the dealer a good poke but that’s probably what they deserve. Maybe you could substitute the warping frame for an incredibly patient friend?
LikeLike
I had exactly the same problem as I expect any beginner weaver would. I bought an Ashford table loom and then started with “Learning to weave with the Table Loom” only to discover I needed extras, a raddle and some means of warping like a warping frame as well as other bits like “helping hands”. These extras, unlike a few batteries, are a significant expense! Fortunately I’m a woodworker and so made my own warping mill and raddle.
LikeLike