What do criminals and crafters have in common? According to the Oxford English Dictionary, quite a lot! Their definition of the noun ‘stash’ is as follows:
stash, n.1 slang (orig. and chiefly U.S.).
1 a. Something, or a collection of things, stashed away; a hoard, stock; a cache.
- A cache of an (illegal) drug; a quantity (of a drug); the drug itself.
- slang (orig. Criminals’). A hiding-place, a hide-out; a rendezvous; a dwelling, ‘pad’.
The meaning of the verb ‘to stash’ isn’t much better either:
- To bring to an end, stop, desist from (a matter, a practice); to quit (a place). Often imp. stash it!, stash that!, †to stash the glim: to cease using the light. to stash up: to bring to an abrupt end.
- To conceal, to hide; to put aside for safe keeping; to stow or store. Freq. with away. Formerly Criminals’ slang; orig. U.S. in revived mod. use.
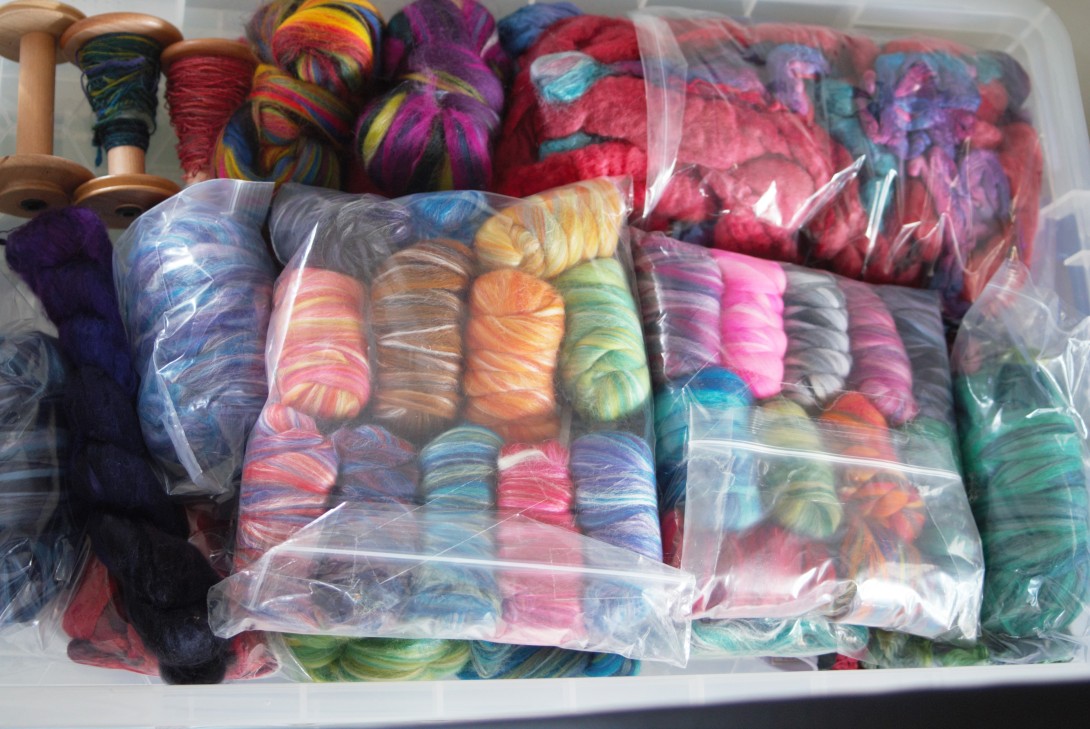
Perhaps this is why, for many crafters, the stash is a source of great guilt and shame. The stash is full of project never realised, ambitions dashed by the pressures of real life and represents not only a giant tripping hazard, but a lot of wasted money and impulse purchases.
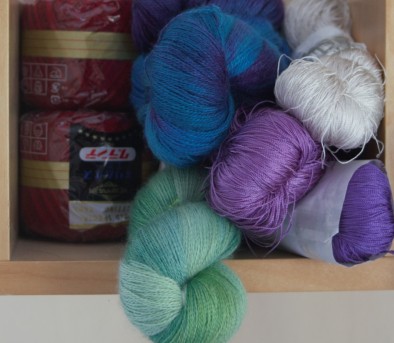
Personally, I don’t see a huge stash as a problem at all. It’s nice when I want to play with ideas to have a good selection to choose from and it’s often playing with and comparing colours, fabrics and fibres that helps with my design work anyway. After all, correctly stored fabrics never go off.
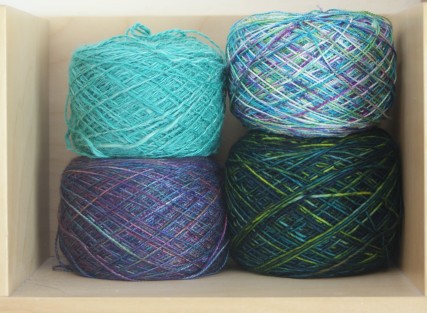
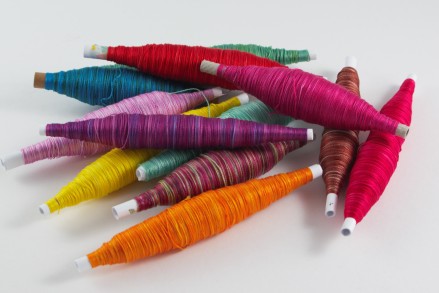
However, correct storage often poses a few problems. I’ve mentioned before that a few skeins in my care have met some very messy ends, which is why I was keen to find a way to keep my weaving cottons safe.
Winding them onto bobbins seemed like a wise idea, given how little space I have in my studio, but, maybe someone knows a better supplier than me but I can’t seem to find quills or purins for less than 60 p each, which isn’t an insignificant cost.
Thankfully, making your own is actually incredibly easy and costs just the price of half a sheet of A4 paper, some tape and slightly sore fingers.
You will need
Selotape or very fast drying glue
Scissors
A4 paper (100 gsm works nicely)
Knitting needle (diameter ~ 0.5 mm larger than your bobbin winder)
Instructions
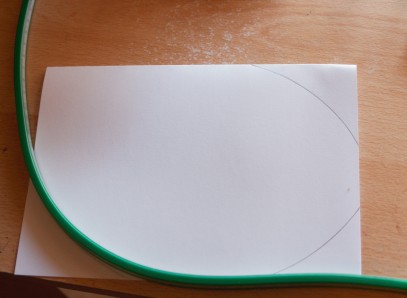
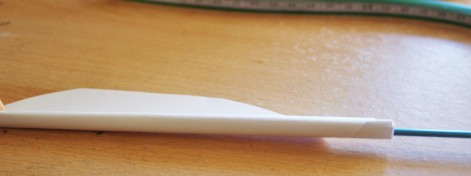
There are lots of different ways to cut the paper to make your quills and lots of different shapes that will work. The main thing is to mitre the corners of the paper to make it easier to start rolling it up and maintain good tension while you’re rolling it.
The trick is to start with a narrow width at the point you will start rolling. I found a large oval shape worked best. You can make the paper much wider quite quickly, it’s just getting started that is a bit tricky. The less rolls of paper you have, the softer (and easier to squash) your quill will be. This will make quills that are about 12 cm long and reasonably strong.
You don’t need to obsess about getting the shapes symmetrical, you won’t be able to really see it in the end, the crucial part is in the rolling.
You can try rolling the full width of the paper but this is incredibly difficult and may result in tears and swearing. Don’t say I didn’t warn you.
Once you’ve cut off the corners of your paper, make sure you have your selotape (or glue) at the ready. Check you’ve already found the end otherwise you’ll be wishing you were an octopus in a few minutes. If you need scissors to cut the tape, make sure you’ve got them at hand too.
Now for the tricky part. Ideally, you want a knitting needle with either a round head or a double pointed needle to do this so it will roll smoothly across your desk. Generally, the quills will be 0.5 mm in diameter bigger than the needle, so you might want to check the size of your bobbin winder. Unless you are incredibly skilled at this, the centre of the quill will be a little larger than the knitting needle you’re using as it will loosen slightly while you’re taping it.
Place the knitting needle at the end of your shape and start wrapping the paper around. It’s easiest if you push the needle away from you and keep pushing your fingers around with the paper as it rolls on. It is crucial to keep the paper as tightly rolled on the needle as you can.
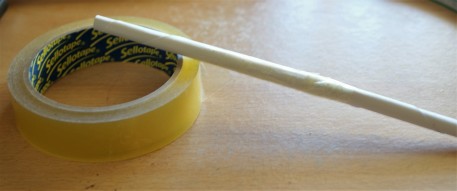
When you have rolled across the length of the paper, keep the paper pinned to the needle with your finger and tape the paper down. To avoid any possible risk of the paper unrolling I then wrapped the selotape along the length of the quill. I haven’t found the more slippery surface causes any issues with winding thread on either. You can use glue instead but make sure it dries quickly so the tension of the wrapped paper doesn’t immediately cause the quill to spring open.
The end of your quill will be a little weaker than the centre because of cutting the corners off the paper in the beginning. I wanted relatively sturdy quills, so I just chopped the weaker parts off.

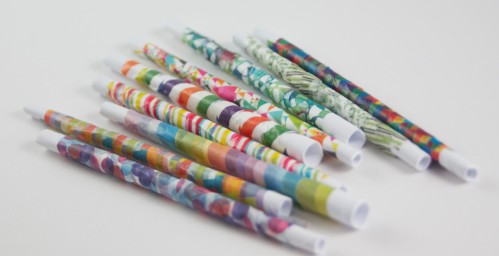
As selotape is not the most exciting looking finish in the world on white paper, I decided to wrap some washi tape around on top of it just to liven it up.
You need paper that is flexible enough to roll but with thinner sheets of paper you may have to roll for a longer length or try rolling two sheets together simultaneously. Art papers with fibre might be a good choice as they are strong but more flexible than something like cardboard. I found heavyweight (100 gsm) printer paper worked absolutely fine.
If your quills are too big for your bobbin winder and you don’t have a stock of balloon springs that will fit, shoving some blu tack inside the end of the bobbin will help keep it in place on the winder. I recommend using quite a lot as it tends to shoot down the quill as you spin but it does an amazingly good job of holding the quill in place. You can just poke it out with a knitting needle when you’re done.
Happy quill making and watch out for the papercuts!

How very resourceful and thrifty of you! Still loving the vibrant colours that all your photos bring to each post. Thanks for another educational read!
LikeLiked by 1 person
Thank you! Everyone needs more lurid colours in their life…
LikeLike
Interesting post but I have to admit my eye was drawn to the first picture and the fibre there – World of Wool sample packs?
LikeLiked by 1 person
Good eye there! Yes, they are the World of Wool Northern Lights and Constellation mixed bags.
LikeLiked by 1 person
Had to laugh at your comments on stash – just perfect!
LikeLiked by 1 person
I have yarn envy lol
i can’t wait to get some fall colors :3
LikeLiked by 1 person
great idea! And so much color!
LikeLike
[…] big names, so there’s a lot of choice. I picked up some paper bobbins – I would normally just make my own but the one nice thing about the cardboard bobbins is they’re covered in little bumps which helps […]
LikeLike