Disclaimer: This post contains affiliate links meaning if you purchase the book through these links, I receive a small commission to help keep running the blog. However, any recommendations and opinions in this review are my own. For more information, please click here.
Sometimes finishing all the stitching is only part of completing a piece of embroidery… Having finished quite a few pieces now that I’ve ultimately ended up framing, the process of mounting it up has become a lot less intimidating. This is great but it also means that it has become a bit routine just putting pieces on square mount board to stick in a frame.
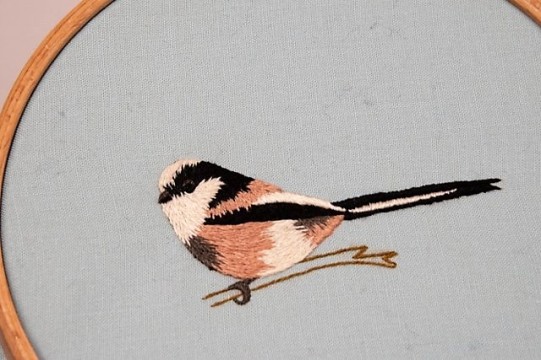
My poor little Silk Shaded Bird has been in the embroidery hoop for so long that I think I’ve become accustomed to seeing it sitting in a ring frame. Many people do use hoops for mounting finished pieces but it’s a little bit of an expensive way to finish the piece and I really like the raised structure you get from using lots of padding on mount board. Therefore, the best compromise seemed to be trying to mount it on a round piece of board, rather than the more traditional square.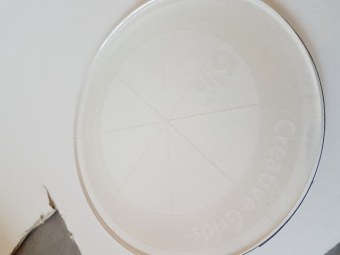
If you’re stuck for what to do with a piece, Sophie Long’s Ribbonwork Embroidery has some really creative mounting ideas (and you can see my full review of the book here) but, in the end, I ended up using the instructions for finishing buttons from Helen Richman’s Stumpwork Embroidery (which is a wonderful book, definitely worth buying for the completely awesome Stumpwork Goldfish, The Little Secret Garden and the Watering Can pin cushion patterns, all of which now exist in kit form!)
Most books cover mounting on a square piece of board, which is actually a little bit easier than trying to mount a round piece, even with the ever-irritating need to mitre and sew the corners. I would promise that mounting a circular piece isn’t nearly as hard as you might expect except the whole process of mounting this poor little bird up ended up being a bit traumatic, mostly because of my own stupidity.
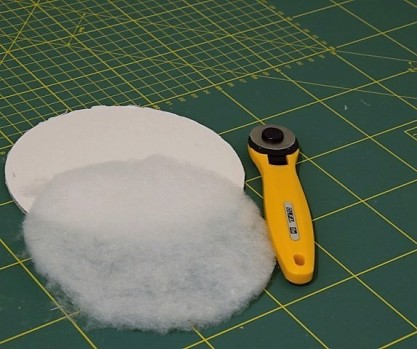
Cutting the mountboard and the wadding was much easier than I expected thanks for a perfectly sized round quilting template I had lying around. I highly recommend using a good scalpel for cutting the board – I have tried using decommissioned rotary cutters for board but find I end up squashing and wrinkling it as I cut. Cutting a circle of the wadding with the rotary isn’t too tricky, but if you’re struggling it can be a bit easier to do with a smaller diameter blade.
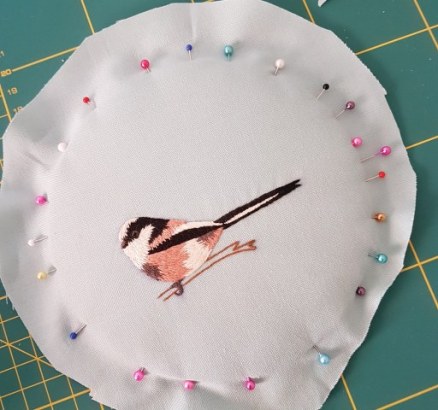
Where it did start to go wrong was with handling the fabric… As you can probably see from the close up photo there’s a lot of black dust on the fabric as the poor piece was hanging around for rather a long time waiting to be finished. This is why you’re supposed to take care with keeping pieces covered… Naively though, I thought this would not pose a problem as, after all, I could just wash it right?
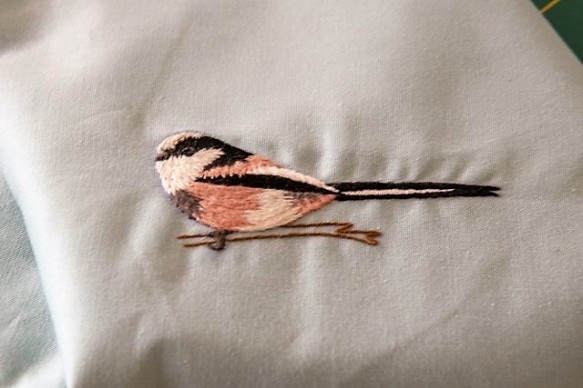
I also wanted to give Mr Birdie a wash to see if it would relax some of the tension you can see along the top of his tail. As silk shading has such a huge density of stitches it’s easy to get puckering in certain areas of the design, particularly if things aren’t tensioned very well. So I popped Mr Birdie in a nice lukewarm bath having forgotten one of the cardinal rules of washing embroidery… check the design lines don’t end up forming a dyebath.
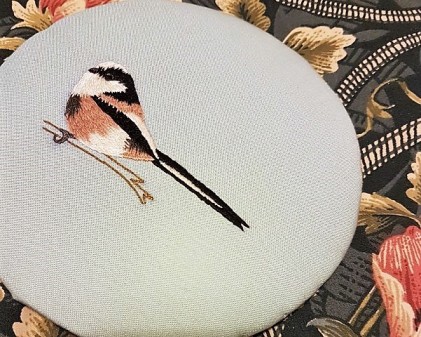
This is the tale of how Mr Birdie ended up with a nice blue halo around his left side. Whoops. To make things worse, when I was trying to iron it before stretching, I mysteriously managed to find a stray crystal of actual magenta dye that ended up staining the work too. I have no idea where it came from but luckily it was far enough from the design that I could do some strategic framing to hide it away.
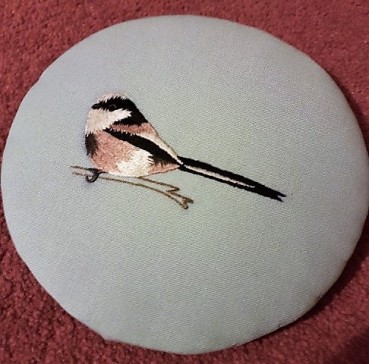
I was initially very conservative with how much fabric I wanted to cut off before starting to gather it around in the back which also gave me a few problems. It’s much easier to do this with less bulk, so be bold and trim away. After putting in a gathering line, I then laced the piece worked in a circle (a bit of a nightmare of crossed threads in a few places…) as it was the only way I could really get the tension I wanted to pull out the gathering near the tail.
In the end, other than a slight ethereal aura to one side of him, I was happy with how the mounting looked. I was worried it would be hard to get a smooth edge to the circle but if you can cut the mount board without crushing it, don’t have a huge excess of fabric at the back and the wadding is cut nicely to size, then it’s relatively straightforward to get a nice finish.
The recipient of my Silk Shading and Goldwork monogram had a custom frame made as I couldn’t find anything in the size and shape I wanted and it’s a pain to find a lot of choice in terms of box frames. I was really happy with the job the framer did and it was a nice touch how he’d considered how to match the wood and depth of the frame to the piece. Unless you can find a Wilkinson’s box frame in the size you need, they tend to cost around £10-15, which made getting it professionally framed very good value considering someone else had to the assembly and I didn’t have to worry about what size to cut everything! I might consider doing the same for this piece at some point.

Such a sweet little bird, and some good points for all of us to remember! I’ve never had a huge amount of luck mounting (generally), but also specifically with a circle. Perhaps there is too much bulk that I’ve been trying to deal with…
LikeLiked by 1 person
I think circles are nice as it’s more forgiving with the design placement! I think cut off as much as you dare (and how strong you think the fabric is) and start and stop the lacing a few times as you work around so you don’t just make a huge tangle. Good luck!
LikeLiked by 1 person
[…] I have to say I did have a few concerns getting started on the poinsettia petals. They’re not the most common shape you can find good tutorial examples of (please, can the next person who creates a silk shading tutorial not just do it on a petal shape that you’d get on a daisy or a pansy?) and I’m a bit out of practice on silk shading too. I’m not sure I’ve done much since I finished my adorable little birdy. […]
LikeLike