I was getting a little bored of making coasters but was enjoying being strict with myself and sticking to small manageable projects. Still, fabric coasters aren’t exactly the most useful things and, although I think I still have a bit to learn about getting neat bindings on, it was time to try something new. Today’s inspiration came from a tutorial over at The Sewing Chick for an incredibly cute zipper bag.

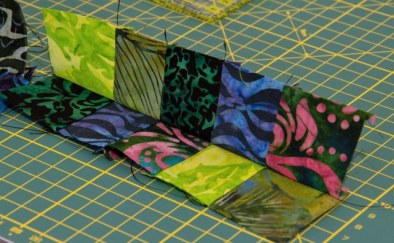
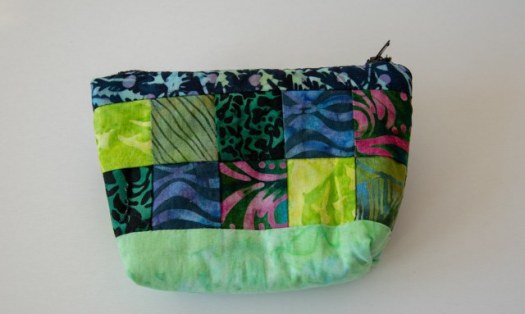
I love the beginning of any patchwork project, trying to find colours that will work well together. When I’m doing this, I often feel that I’d never quite have a stash big or organised enough to get exactly what I want but I think working within the constraints of what I have can be good fun and does encourage me to go for some whacky combos I might not consider otherwise. I went for the good old faithful Moda Spraytime for the inside of the pouch and an assortment of different batiks, on a vague theme of greens and blues.

I’ve also been wanting to start experimenting and understand interfacings, linings, waddings, stabilisers etc. which are part of the motivation for trying to do a ‘useful’ project. It’s very easy to get overwhelmed with all the different options there are out there but sadly my local shops don’t stock a huge range so it’s difficult to see the differences live and a feel for how stiff or padded different kinds are, turning this into a trial and error process.
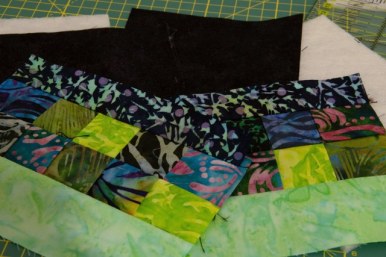
For this project, I ended up using Vilene H640, which is nice and easy to bind to the fabric with an iron but probably inappropriately puffy for the project at hand. It might be good if you deliberately wanted something very padded to keep the contents safe. It does mean the pouch is quite capable of standing on its own but did contribute to a few of issues that turned the whole process into another ‘Crafting Argh’ project…
For the following project, you need to have the following skills: cutting, piercing and pressing patchwork, making and attaching bias binding, box seams, fitting a zipper… and in my case, getting very good and tearing apart your sewing machine. It turns out that the cutting was the only part of this project that was actually destined to go well… Please don’t blame the tutorial, that is actually very well written, photographed and clear. Absolutely blame my stupidity and inability to follow instructions, think before I do thinks and not get very frustrated!
I ended up making my pouch a custom size as I work in centimetres, with awkward ¼” seam allowance. I still haven’t found a good solution to the ‘my cutting tools are all in centimetres but my sewing machine is all inches’ problem, though I would like to try buying one of the ‘add a quarter’ bars I’ve seen at some stage and see if I can just get absolutely perfectly lined up blocks.
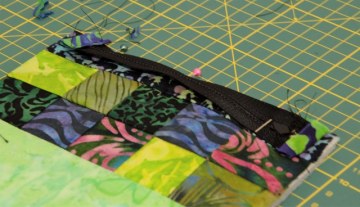
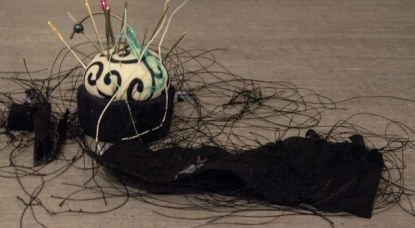
Adding the interacting and sewing side one of the zip also went without too much hassle… However, it turned out this was to be a very, very lucky fluke and things were about to go very quickly downhill resulting in what felt like an endless cycle of 1) break needle, 2) jam machine, 3) unpick… repeat ad nauseum. Rather than spell out in excruciating detail how I managed to slay 3 Microtex needles, nearly throw my Bernina out the window and shred through a significant portion of my Mettlers thread, I will tell you how the novice sewer can avoid such mistakes.

Use the right machine foot for the job… It is possible to attach a zip with a standard foot, but zipper feet are amazing, wonderful and make the whole thing way less painful. If you don’t know how to attach a zip – watch this video. The lady is a little scary but her tutorials are incredibly helpful and she is relatively efficient at getting to the point of what you want to learn unlike a lot of video tutorials. Finally, when you’re following a lovely, good tutorial, actually read the instructions and follow them, don’t just randomly start sewing different parts of your pouch together… I can confirm it is not productive unless you enjoy practicing with your seam ripper.

Alongside my general inability to sew, my beloved Bernina had also decided to be as uncooperative as possible and kept jamming for seemingly no reason. The good news is that it is easy to flip the foot plate up on them and have a good fish around for lost bits of needle… I still don’t really understand what causes it, but often when I get a jam, it seems that the only way to avoid it instantaneously jamming again after re-threading is opening it up and having a run around with the brush. A bit of oiling also made a big difference to how smoothly it was running. I didn’t enjoy or appreciate it at the time but I’m wondering how long it’s going to take me before I’m able to do a full service on the machine myself…
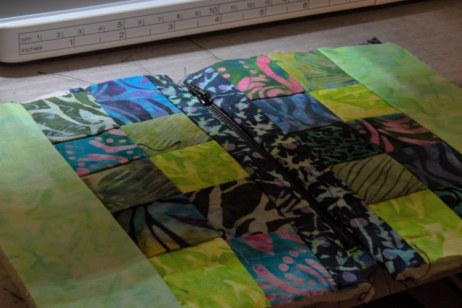
One of the problems I had with the interfacing being as thick as the Vilene H640 was because I cut it to the exact same size as the front and lining panels, including the seam allowances. This made things are nightmare to turn out and it very difficult to do the box seams as, even with some selective trimming, there was just too much bulk to deal with. You live and learn I guess? I had fun binding the raw edges on the inside of the pouch too as it was so chunky, I had to make the bias tape a bit wider. If you need to make bias binding, the Clover tools are awesome and there are some great guides on the starting/finished sizes here, and some tutorials here and here that are really helpful.

I didn’t realise until after I’d finished that the corners are supposed to be box seams but they were very hard to get anything resembling right as there was so much bulk and mismatching of the seams I couldn’t really work out what I was lining up with what! Overall I’m very happy with the colours but it feels like a shame to have used such a nice combination of fabrics on such a disaster project! While the final thing does resemble a pouch, and the zip does work, I’m not very happy with the overall shape or the corners and the interfacing is so thick it looks a bit comical. This was one I was very happy to get to the end of… but I think I might like another go at it…

I’m not sure why your thread is jamming but I’ve found on my machine that sometimes when I’m sewing a thick quilted project it’s easy to forget to lower the pressor foot because visually there is no space between the foot and the material so it isn’t obvious that the foot is still up. When the foot is up the bobbin thread tends to jam underneath. Hope this helps.
LikeLiked by 1 person
Thanks a lot for your comment – I definitely did fall into this trap once or twice! I think the machine sadly is very sensitive to any small bit of thread ending up around the bobbin casing which is why it enjoys jamming so much once it starts.
LikeLike
If nothing else, this sounds like it was an educational project!
LikeLiked by 1 person
It definitely was!
LikeLiked by 1 person
[…] Despite all that, I’ve managed to do some cool things this year. I’ve finished a few pieces, including some RSN Day Classwork that has been hanging around with my goldwork and silk shading. There has been some great travelling adventures, including my first trip to South Korea and its incredible markets and the San Francisco School of Needlework. I’ve been getting over my discomforts with the sewing machine and enjoying many mini-projects there. […]
LikeLike
I think it still looks pretty good – better than what my first attempt will be, I’m sure! I’m enjoying reading your blog – it’s a great visual journey 🙂
LikeLike
[…] the frustrating mess that was my last zipper bag, I decided the best thing to do was to confront my fears head on and […]
LikeLike
[…] all the fuss about them was about when I first bought it and I did have a few false starts with blunted needles causing endless aggravation but apart from that it has been smooth sailing and beautiful stitching. […]
LikeLike