After the exciting delivery of some new Kemtex colours and picking up some new ideas at Wonderwool, I have been eagerly awaiting the chance to dye some more silk. I normally paint the silk in a relatively random fashion but I wanted to try something a little more sensible and to have a go at making some colour gradients.
I spent the morning remaking all my old dye stock solutions and making up my new colours as well. Previously, I had been using white vinegar as my fixing agent but I wanted to try using citric acid and adding some urea. The purpose of urea is to increase the solubility of the dyes (therefore allowing you to make higher concentrations) for brighter, more intense colours as well as helping to keep the fibre moist, particularly during the fixing stage.
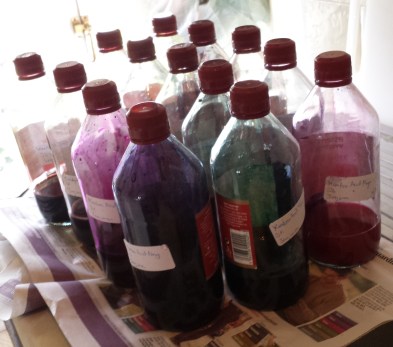
It was while making up the dye stock solutions that I made a mistake I wouldn’t realise until much later… I made up approximately 5 % dye solutions, added the citric acid and the same amount of what I thought was urea, as recommended in the Kemtex instructions. I’ve heard a lot of people saying they use 2 % concentration dyes for painting and 1 % for immersion dyeing but I have never found concentrations that low give me quite the colour I wanted, hence the higher concentrations.
Counterintuitively enough, most chemical dyes are actually not very water soluble. Certain dyes, Kemtex Black for example, are notorious for being difficult to fully dissolve. This is problematic because unless you want to start filtering your solutions, undissolved dye means you have no idea what the concentration of your solution is and makes it difficult to get predictable, repeatable results as well. I’ll talk a bit more about the chemistry of all this later but back to playing with colour…
I gave the silk a rinse in cool water before I left it to soak overnight in water with a lot of citric acid added. The silk I have isn’t pre-treated and the previous batches have been really clean so I didn’t worry about scouring it thoroughly. I made sure the silk was relatively dry before I start applying the dye, as I didn’t want any additional dilution of the dyes.
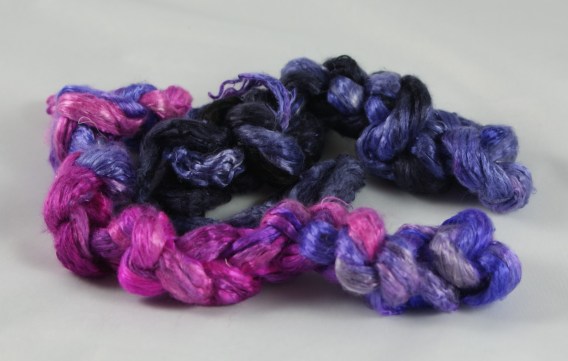
After the poor results with the black from my last set of silk dyeing, I was keen to see if the combination of citric acid and more concentrated solutions would fix this, so I started with some pure black in the corner trying to work through dark to light purples before going to magenta/pink at the end.
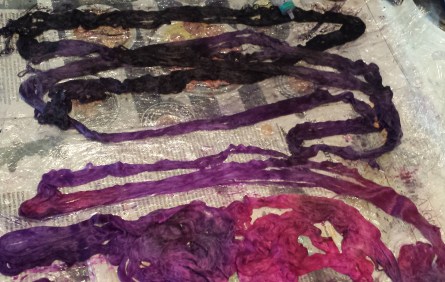
The more concentrated dye worked a bit better than I had anticipated and I found even a drop of black mixed with other colours was enough to transform everything to shades of pretty much black. Be careful, Kemtex Black is well named!
I ended up getting a little overexcited and distracted from making a smooth gradient when I put the Kemtex Pink and Magenta on the silk. The Magenta is slightly darker than the Pink but they are quite similar and both garishly bright. They mix really well with the other colours and are easy to blend in too. I intentionally left a few areas under-dyed to break up the colour slightly.
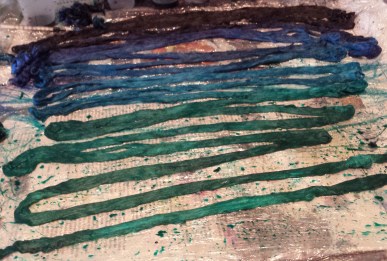
I did a similar process with shades of blue and eventually to green. Kemtex Navy looks really similar to Black when the silk is wet but they are very distinct colours when they dry. The transition to the green in the silk was more sudden than I wanted as I underestimated quite how much the Jade would overpower the Turquoise when I mixed the solutions. They’re a bit easier to just blend on the silk.
I steamed both of these for just over an hour, which seems to be the upper limit for the amount of heat clingfilm will take before it turns into solid shrink wrap. Both of these needed cutting out of their rolls. I was a bit nervous while they were steaming as the water has turned black rather quickly, so I thought it might not have fixed properly and bled into all the other colours.
However, I shouldn’t have worried because they came out looking rather gaudy and just fine. There was a bit of blue and pink that came out in the rinsing but all the colours and held fast and looked very intense.

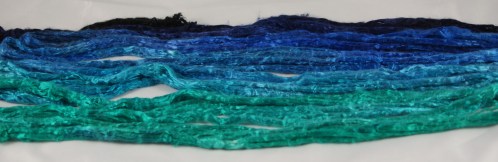


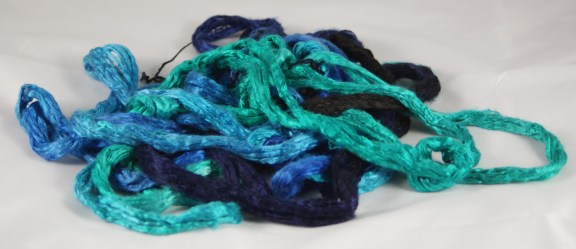
I had a bit of a go at daisy chaining up the silk as well to make it easier to store. It’s a bit messy but I like how the black sets off the other colours.


Overall, I was really pleased with how these batches came out. Doing the gradients was a good exercise but it’s a lot more fun dyeing the top more randomly. However, what was the stupid mistake I had made when I was making up the dye solutions…
Closer inspection of the bottles I’d used revealed that I hadn’t actually added urea, but ammonium sulfate. Both are used as nitrogen sources in agriculture and contain some of the same chemical elements, but they definitely aren’t identical!
Typically, ammonium sulfate is used as the acidic fixing agent with dyes. It’s supposed to give a more even and level colour as it becomes increasingly acidic with raising the temperature of the dye bath. Dharma Trading, an amazing resource for all things dyeing, do recommend adding a little citric acid or vinegar to complete exhaust your dye bath when using ammonium sulfate.
However, I had definitely found the dyes a lot easier to dissolve with the addition of the ammonium sulfate. Ammonium sulfate is also hygroscopic, so should help attract and retain some moisture during the processes as well. The main difference is that urea is actually pH neutral when dissolved in water. A quick note as well, urea is generally described as a humectant. However, as far as I can find, this simply means something that is hygroscopic but added to cosmetics/food to retain moisture. I get really frustrated with terms like this – technical language exists to be precise and have specific, clear meanings and it’s not that easy to find a clear definition for humectants anywhere.
Apparently urea is only really necessary if you’re intending to dry out the top before steaming it. It is significantly more hygroscopic than ammonium sulfate but if you do what I do and apply the dye and steam almost immediately after, it’s not too important.
I seem to have hit on a bit of a happy accident here as this has seemed to work really well for getting the colour intensity that I want. I do want to think a bit harder on the chemistry or whether urea or ammonium sulfate would have been better for helping to dissolve the dyes but I will definitely be testing these new dye batches out on a few more silks!

Interesting, what you said about ammonium sulphate. I add urea to some of my darker colours (red always needs it) so they don’t congeal or refuse to blend with the water, so I’m wondering if you’ve stumbled upon a better solution…
LikeLike
What kind of dyes are you using? I’ve not had too many problems of that type with the dyes I’m using but if the ammonium sulfate does enhance the solubility in the same way urea is meant to then it might help.
LikeLike
I’m using Dharma Trading, Eurolana, Ashford and ProChem. Everyone I know complaints about the reds, whichever they use – I had to start using use bottled water to make my dyestock so it wouldn’t give me more trouble!
LikeLike
That luster and those colors! It makes me want to try using silk in one of my projects. Well done. I might have stumbled upon specific posts, bit is silk your go to fiber for projects?
LikeLike
Thanks so much. I tend to use silk as it is my favourite thing to spin and knit and you can really abuse it during the dyeing process without worrying about things like felting. It also takes dye incredibly well and you can get some fantastically intense colours.
LikeLiked by 1 person