After my recent ‘finish’ of the canvaswork pincushion (still needs constructing!) I wanted to get straight back on with some stitching, and with one project nearly out the door, no better time than to start on something new!

I’d really enjoyed the canvaswork. It’s unfussy, bright, quick and easy. Except the counting – but I can learn to live with that. I’d picked up a few of Sue Hawkin’s kits at the Knitting and Stitching show, lured in by the bright colours and the thought that spending money would somehow make more time to work on things.

I’m glad for it now as it meant I could immediately start work on her lovely Poinsettia Paperweight kit. This is something of a hybrid project, a mixture of canvaswork with a stumpwork flower. Stumpwork has been one of the techniques still on the ‘to-do’ list of techniques I want to try. Others include embroidered boxes, passementerie, and reticello… well and any other beautiful looking thing I see!

Sue Hawkin’s kits are beautiful. You can purchase the kit here and check out her other gorgeous flower paperweights. You get a generous selection of beautiful threads, all the needles, fabrics and beads you can need and a weighty set of instructions. Feeling surprisingly sensible, I did decide to start by reviewing the instructions carefully (this particular piece comes with two pieces of fabric so it’s not immediately obvious which one you should start stitching on!)
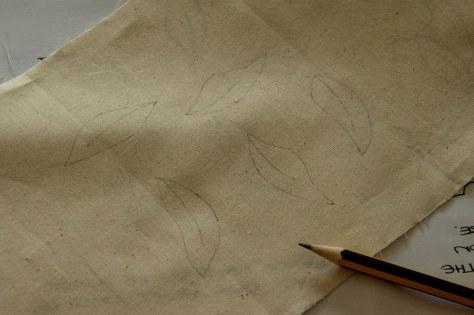
I had wanted to skip straight to the canvaswork but intimidation over trying a new technique and the instructions instance that if I just followed them everything would be fine, honest, made me start with step one for a change – tracing out the petal shapes onto the calico. This is quite thin calico so I didn’t even need a lightbox to see the outlines clearly and it was just a case of arrange the shapes in a way that would be compatible with the ring frame I wanted to use.

After I’d stiffened the back by ironing on the Vilene, for some reason I decided to be tidy and chop the overhanging edges off. Mistake number 1. Turned out the fabric was too small then to fit in my 20 cm hoop. It probably wouldn’t have tensioned properly even with the small excess but it did mean I needed to stitch on a second piece of fabric. I did briefly consider whether tensioning on three sides would be sufficient but I am very, very glad I did not try and take this shortcut. It doesn’t really work and as soon as you start putting in row two of the silk shading you’ll realise that this is brutal embroidery for the fabric and even something that was drum tight will struggle not to pucker.
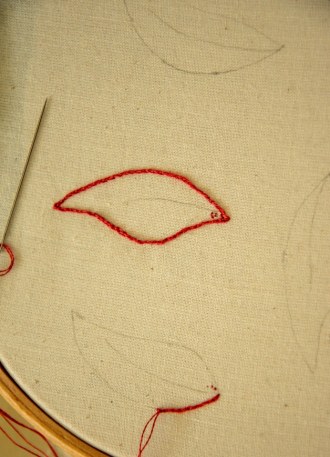
I just did some quick hand sewing (row of backstitch) to join the two pieces together for simplicities sake and this was five minutes well spent. I am trying to get into the habit of embracing the ‘good enough’ with embroidery. I sometimes don’t think the time I spent on my Royal School of Needlework certificate was at all useful for my ability to get things done as it has left me always with this nagging doubt about things needing to be ‘done the right way’ rather than just using a bit on ingenuity to get things working. Perfect is the enemy of good and very definitely the enemy of done.

Then it was a case of whizzing around with some split stitching which I absolutely love. Padding prep work is slow, and sometimes in the case of soft string padding, even a bit painful, but split stitch is quick, fast and joyously mindless. I have an annoying habit of getting too small with my stitches which makes for lumpy edges but as long as I don’t tend towards the microscopic, I find it rather relaxing.

Next time… onto the long and short stitch!


‘Perfect is the enemy of good and very definitely the enemy of done.’ Definitely my new favourite saying – so true!!!
LikeLiked by 1 person
That is a gorgeous kit! I’m enjoying watching your process on this 🙂
LikeLiked by 1 person
So far, a lot of fun too. Going to be nervous cutting all this out though.
LikeLiked by 1 person
That looks like a great project!
LikeLike
[…] it’s nothing worth losing sleep over. I also like keeping a variety of sizes, as while adding extra fabric isn’t complicated, there’s enough prep work with embroidery that there doesn’t need to be […]
LikeLike
[…] was going through my fabrics, looking for some scrap to help frame up some embroidery, when I came across some old ice dyed fabrics I made a while ago and was struck by how nice they […]
LikeLike