Machine embroidery is a lot of fun and there’s a huge wealth of designs out there that come both with the machine and are available either for free or a small price. As I did for my previous monogrammed card, these designs can be combined either on the machine itself or using some embroidery design software.

What if you don’t want to just create designs from parts of other people’s work but make your own? That’s where digitising comes in, creating the series of instructions for the machine to follow to recreate your beautiful work of art.
The main hurdle to digitising is sadly not technical ability or knowledge, but the cost of the software. While embroidery design software (like ArtLink) are available for free or relatively small prices, most of the big digitising softwares have prices on the order of several hundred to over a thousand pounds… There is one developed freeware project available, the Inkstitch extension for Inkscape, but you’ll lose a lot of the creature comforts and automation that come with paid-for programs.
I wanted to have a go though, and thought I’d give the Bernina Embroidery 8 free trial a whirl to make a sampler. Armed with John Deer’s free course, I trundled through the incredibly slow installation process to get started on making something that was never going to beautiful, but hopefully a good educational experience.
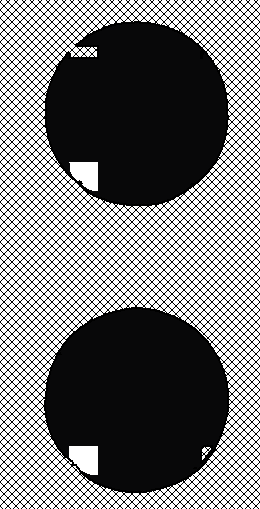
I use Inkscape and vector image files a lot, the advantage being that you can rescale them to any size without them looking pixelated or blocky as normal images would do. To start, I created 5 samples of three different shapes, a plain rectangle for filling, a bordered pattern shape and a circle and then exported these at 300 dpi into a .png format. It turns out the last file conversion step was a complete waste of time as the software apparently can inherently deal with artwork in the form of .svg files but this was not immediately obvious how to import them, unlike standard image file formats such as .png/.bmp.
Not really knowing much about digitising meant I did draw the grids on the circles, which it would turn out later I could let the digitising software deal with instead (I had visions of lattice stitches on a filled background!)
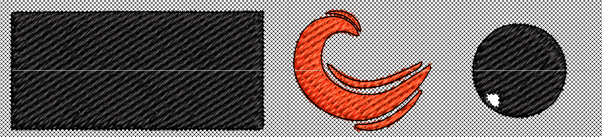
I first tried with the autodigitising tool, which uses differing colours or other selection criteria to try and understand what objects your piece is made of. It did not play at all nicely with the grids on the circles (though did an impressive job of the curved shape in the centre) so I ended up manually using a fill shape for them instead.

Doing this I realised that some areas on the curved shape design would never work well as part of something stitched as the spacing was just too tight, so I manually moved a few of the accents further a way so I wouldn’t just make thread blobs. You can see the original artwork just peaking through at the top.
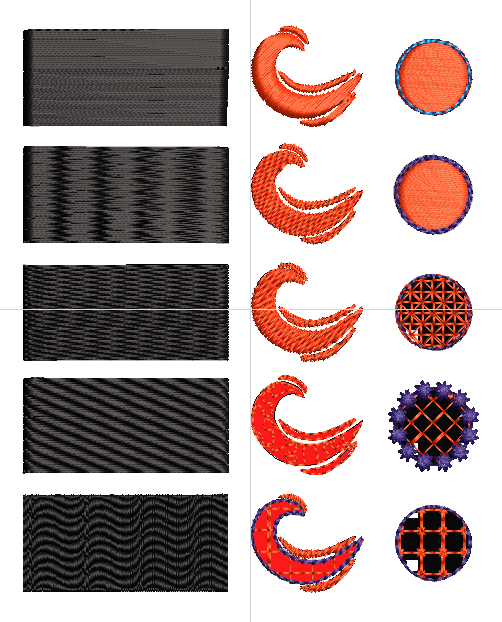
I then did a variety of different fill types (being a complete geek I made a little table of the settings I used – not sure it will be comprehensible to anyone else but you can find it below in case!) There’s an automated outline option for shapes which I used for the circles with a variety of different stitch types, including some fun ones like the Candlewicking.
| Satin 0.4 mm spacing Angle 0 | Satin 45 deg 0.4 mm | 0 mm offset satin fill |
| Satin Special 0.4 mm spacing angle 0 | Step 5 stitch length 2 mm | Backstitch + offset 0.4 mm satin fill |
| Step pattern 1 0.45 mm 5 mm | – | Single outline Blackwork fill 57a |
| Step 4 0.45 mm 5 mm | – | Lacework 1a Candlewicking half knot 3.5 mm |
| Wave2 (90) Default | Outline + fill | Triple lacework 3a |
The question was though… how well would it stitch? For this I was using the medium hoop with calico backed with Brother BM3 stabiliser (iron-on, tear away). The thread is whatever Gutterman stuff I had left over. Colour changes were dictated by turning out of thread! The black is the ever-gorgeous Mettler PolySheen, as is the purple.
How did it come out? Well, I paid zero attention to jumps and tie-in/tie-out – this was mostly left for the software to decide. However, it stitched out with absolutely no fuss (apart from some thread shortages!) and where sensible stitch choices were made, it looks great! The first satin example has stitches that are way too long, beautiful as they were but I am amazed as the variation in textures for the other stitches as well. The ‘Step 4’ pattern has a really interesting texture.

The curved shape was generally reproduced well, though it was far too ambitious to try and fill the small areas (knowing what I know now I would have used running stitches rather than trying a fill). Example number 4 is a pattern that is totally lost without an outline, though it looked like that on the screen, but the main thing is that were no big surprises by how things looked. I really like the last one with the heavy running outline and the grid fill. The slight texture to the outline is lovely.
The circles look great in satin but I think would have benefitted from an underlay so you can occasionally get a glimpse of the fabric below and on a moving garment this wouldn’t work. The outlines are nearly spot on with no gapping but it is the three last examples that win for me, I love those patterns with the outline! They look like mini-temaris!
There’s a lot of ‘not best practice’ here, but it look me less than half hour to get the design digitised and then just the time to hoop up and deal with one or two grumbles from the Bernina when it had gobbled all the thread as it stitched out. I wanted to get a feeling with ‘bad’ digitising how much pull and distortion I would see but it is not nearly as severe on these types of shapes as I expected. Now I am just eager to get on with the next sets of tests!

Not something I would ever do but quite fascinating. Samples look a good idea, to see how the software pictures compare to the real world results. I really like the fill in the third one.
LikeLiked by 1 person
Me too – some of the fills are a lot of fun. Plenty to learn on the road ahead.
LikeLiked by 1 person
[…] obvious solution then was to put my digitising skills to practice and make something perfectly to size. I did this using the Bernina Embroidery software though […]
LikeLike