I’d had such a great experience with the badge felt at the class at London Embroidery Studio that I’ve been scouring the internet to try and find a supplier of something similar. This is always a challenge when you just have a sample of the material and you can’t exactly touch and check things online… Plus, I am always quite surprised how few places stock machine embroidery supplies. I guess this is partly as a lot of places that do cater more for the commercial end, so while 200 m of stabiliser sounds great, it’s probably not something you want to live with!
From looking at the badge felt we used, it was clear it wasn’t pure wool felt but also seemed a long cry from the weird partially polyester fluffy fiend that I used for this cat. From feel and looks it seemed to be pure polyester (and I didn’t fancy starting a fire to try and tell if it was or not) so I bought some 220 gm-2 ‘dense’ polyester to try. Turns out, wasn’t a bad guess, though I am really surprised in the difference in stiffness between 200 gm-2 pure wool felt and this stuff. I appreciate fabric weight is not always the best metric for comparison but it’s so hard trying to compare like-for-like when usually all you get is a few vague adjectives and no specifications to compare.

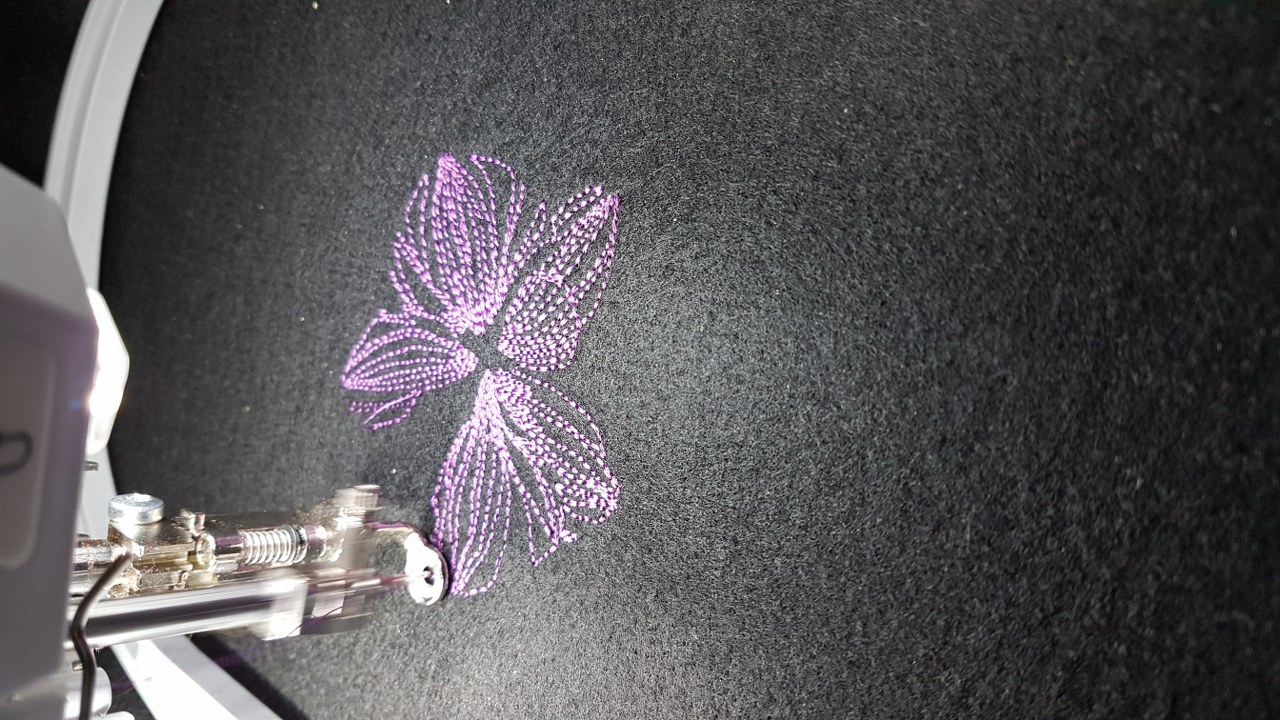
I can say though that, if this sample had been my first experience of polyester felt, I would not have been so quick to dismiss it as a terrible material. It is sturdy but cuts really cleanly with no fluff and is a very forgiving dream to sew on. I did some quick doodling in Hatch to draw up this orchid and just have a play working on smaller designs. That satin stitch is only about 1 mm wide for most of the design! The rest of the decoration is all done with triple runs, and with the exception of one or two tiny loops from a tension hiccup and one little escaping running stitch, it came out super cleanly. Perhaps some of the density in one region is a bit overkill, but the machine was still running very cleanly and making happy stitch noises. Listen to your machine, they are very communicative with their sounds!

Of course, this was supposed to just be sampling to try out the fabric/stabiliser/needle combo and to get just more practice in digitising as you can never practice enough, and it had all gone too smoothly so far. I went for a very tricky photo of a lily, that I wanted to do in a similar style (satin stitch outline of main shape) but this time with satin stitch fills. Satin stitch just looks fabulous on machine embroidery, but getting something utterly crisp, sharp and with an even coverage is not that straightforward. I think sometimes long and short by hand is far more forgiving and then I think about what the machine can manage in terms of stitch coverage in ten minutes versus me in ten months…
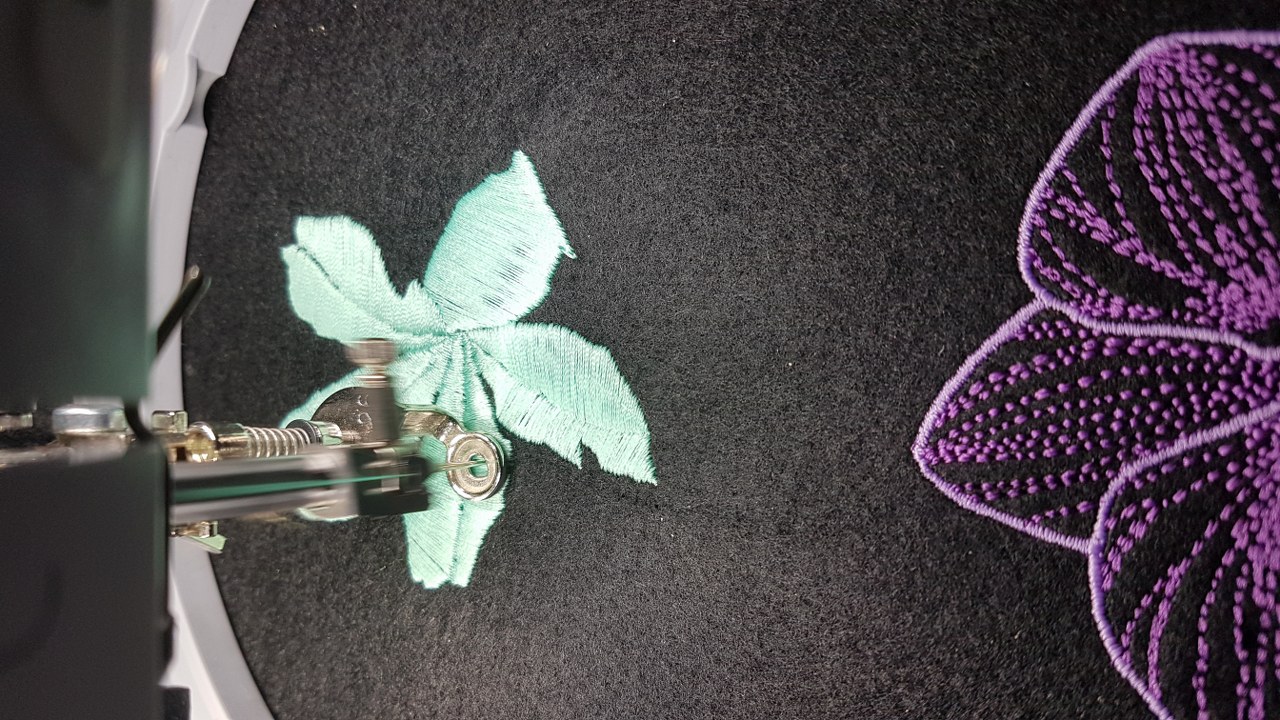
The shape for this design was already quite difficult and one of the real challenges in digitising is using shapes that are appropriate for the size you are working at. It is really easy to get lured into the land of infinite detail, forgetting stitches have finite lengths and sizes and can feel surprisingly chunky when you’re working on something that’s around 7 cm tall.
Generally, depending on what the object is going to be used for, the advice is to be very careful with long satin stitch lengths. They snag, and longer stitches end up with more ‘pull’ on the fabric due to the tension. Overall, the satin stitch border for this one isn’t too bad. I thought it might look ‘fussy’ in a few places trying to stick too closely to the original ragged edge of the flower but that has mostly worked well. I did end up opting for a 1.5 mm width stitch as 1 mm is miniscule!
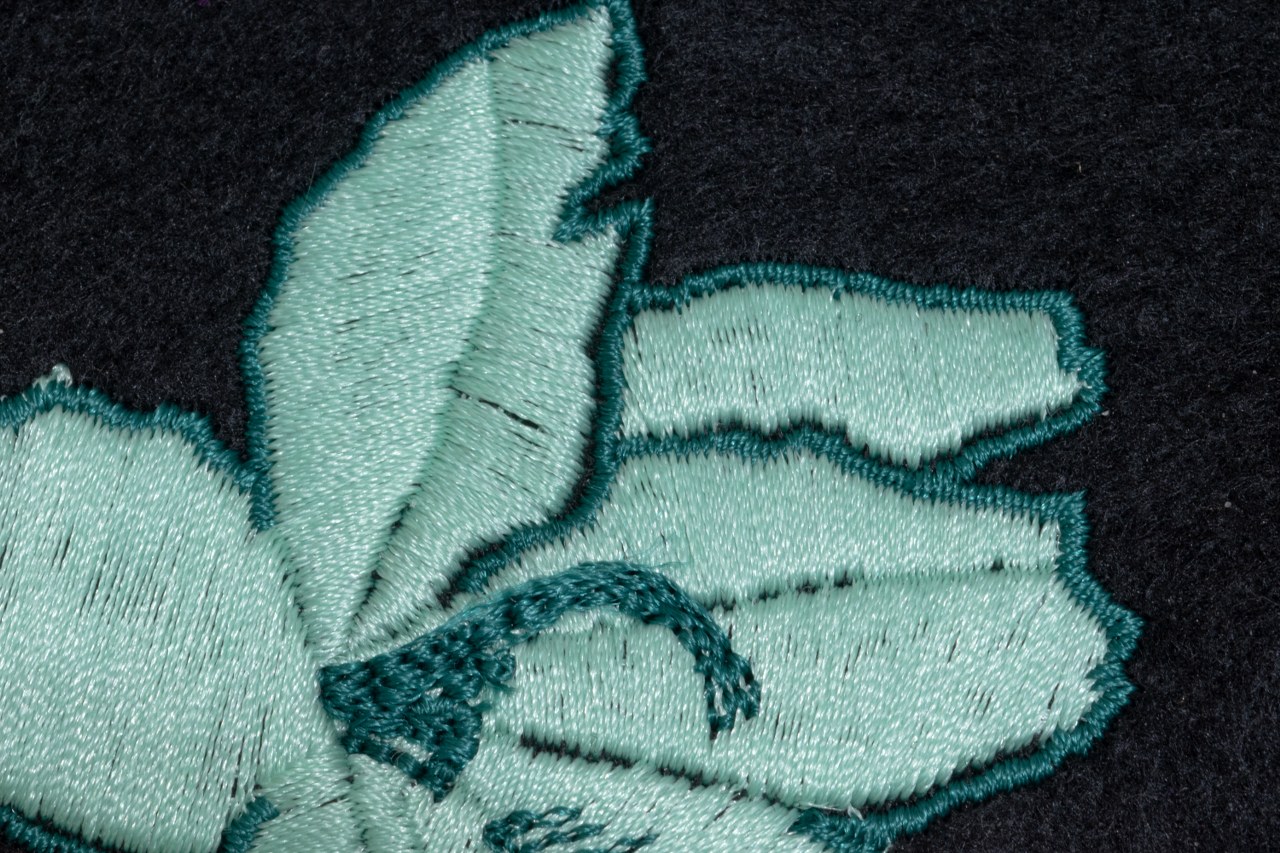
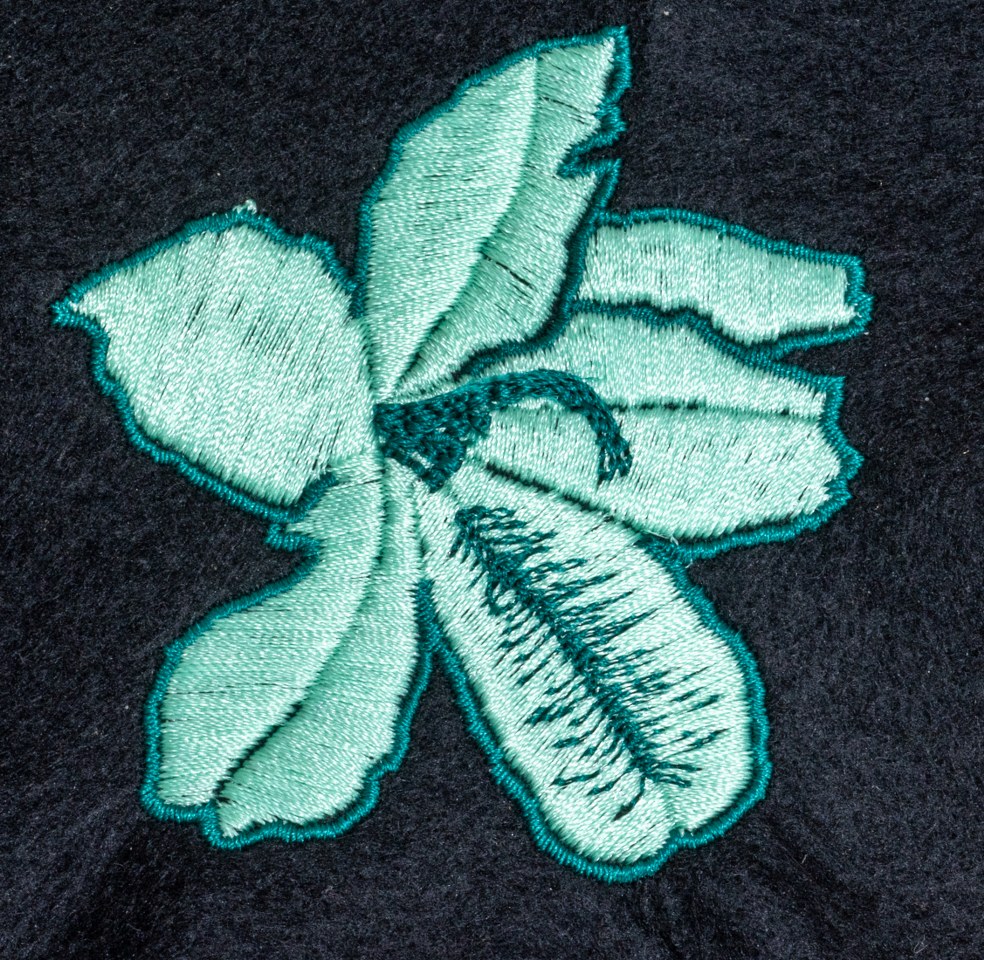
The satin stitch is okayish. I think the overall construction has mostly come out okay, still not sure I like the ‘flat’ petal without the split, it’s a bit bland but lots of practice of silk shading has paid off. What really hasn’t worked is the centre of the design – I did an excellent job of going completely overboard with the triple runs, making sufficiently dense thread layers that I distorted the fabric in the hoop which in turn buggered up the registration for the final part of the satin stitch edging… Whoops! The pull compensation and overlap of the satin areas is clearly not okay in a few parts and if you get unforgivingly close you can see some gapping in the fills.
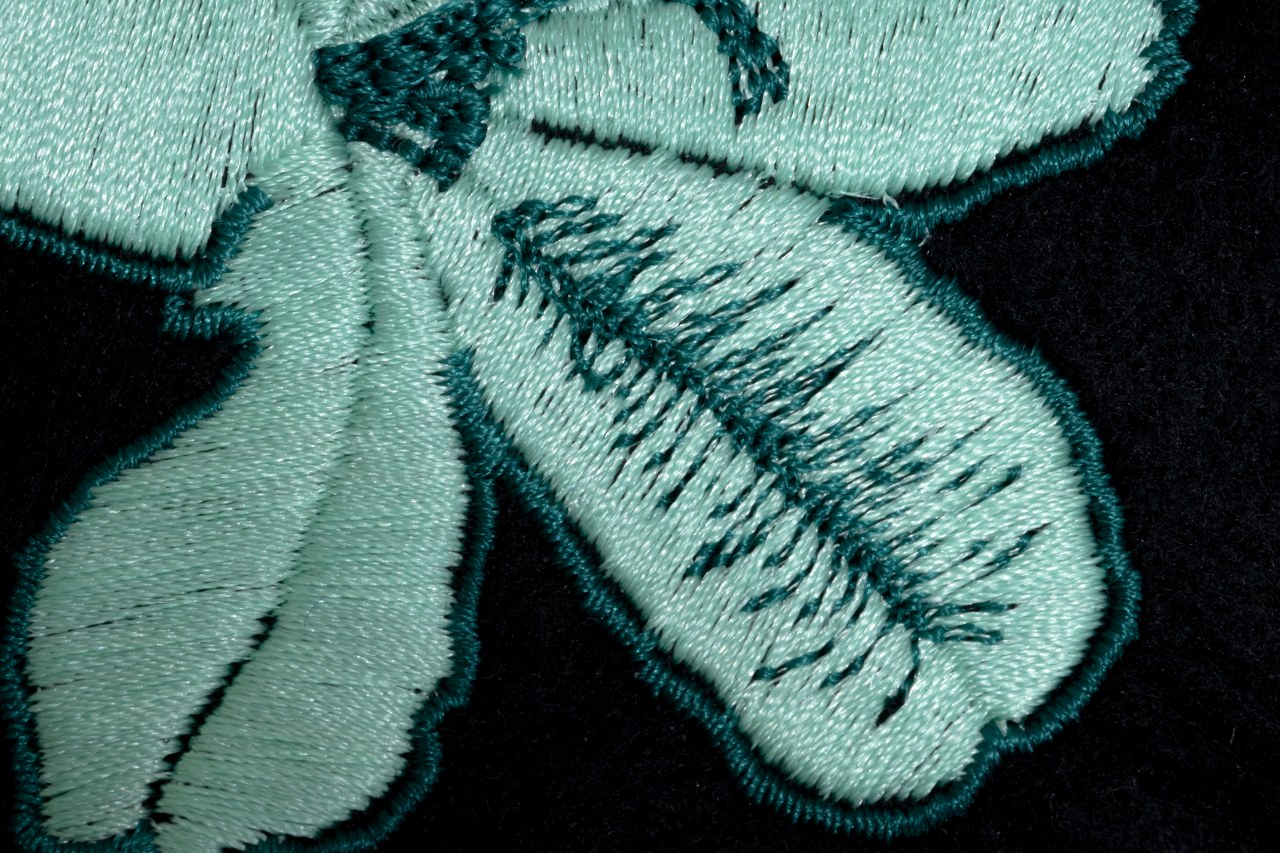
I was oddly pleased this one had gone ‘wrong’ as it was now an interesting case to think about! I had deliberately chosen to include some elements of doing running stitch over the satin as I’ve had horrible luck in the past with the running stitch making the satin stitch look gapped and the stitching sinking and generally looking sorry for itself.
This is also the case here and I also made the mistake of digisiting with lines coming from a ‘spine’ down the centre of the leaf – which to me looks like a funky coloured trilobite has parked on the flower and caused mayhem in the satin layers with its little legs.
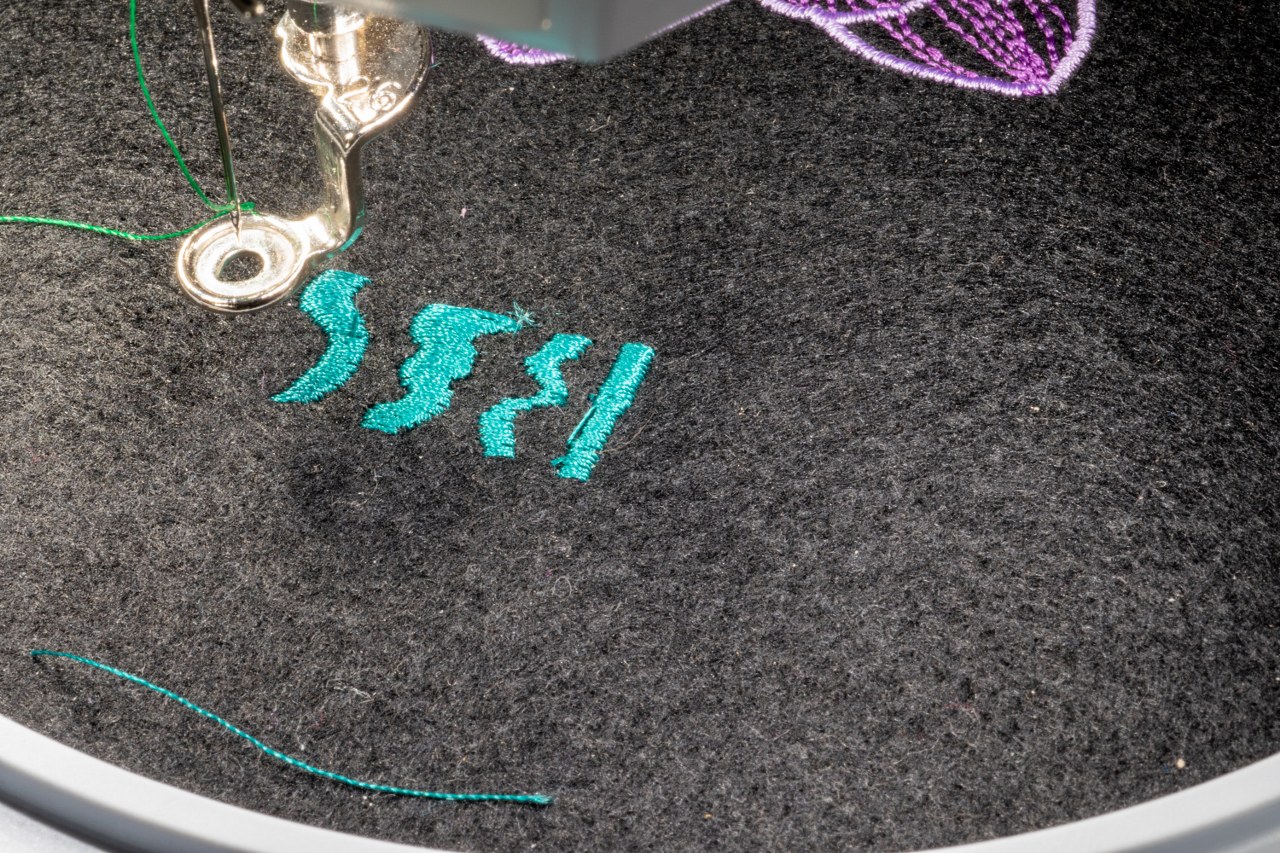
I went away and did a bit of homework before running just a few quick samplers on the same hoop (I had hoped to have more room but it turns out the Bernina automatically tries to stick your design in the centre of the hoop regardless of how it was digitised – both amazingly useful and not useful at the same time). I tried a few blocks of weirdly shaped satin stitch with running stitch on top to see of varying stitch densities or angles was the way forward.
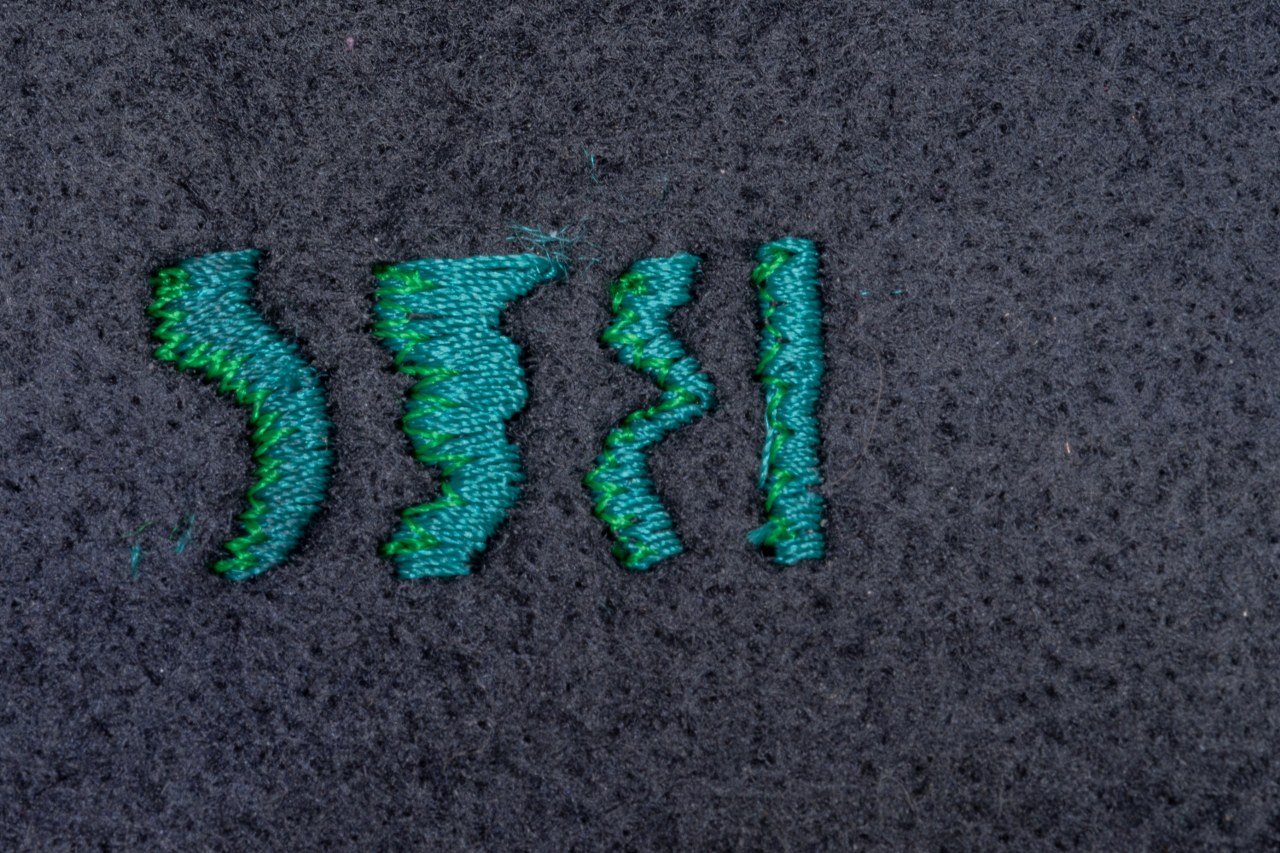
The first column, which is probably the most realistic shape, actually looks quite good! Increasing the satin density isn’t a magic bullet, but the key thing is not to get two stitches which ‘pull’ the satin apart. One more thing to keep a beady eye out for. This was fun though – it felt really straightforward to go from idea to having something stitched out, which is how sampling should be. I like how visually effective and easy running stitch is and am looking forward to figuring out how to more reliably layer different stitch types for more complex designs!

Enjoying learning about you adventures in machine embroidery. Also interesting to learn about different sorts of felt. As felt is something I use from time to time.
LikeLiked by 1 person
I have to admit felt has grown on me a lot as a material…. think I just needed to find the right quality stuff.
LikeLiked by 1 person
Interesting experiments! I love how your example patterns are turning out 🙂
LikeLiked by 1 person
Thanks! It’s always nice when they run smoothly/
LikeLiked by 1 person
So much to experiment with, and it’s fascinating to read, even though I’m not likely to get machine embroidery equipment any time soon – having more than enough experiments on my hands at present!
LikeLiked by 1 person
I think I need to learn when too many experiments is enough but I’m not very good at that!
LikeLiked by 1 person
Fascinating experiments and I love the spidery trilobite!
LikeLiked by 1 person