First of all, thank you for your very lovely comments last week. I am very lucky to have such kind readers! I’m afraid I don’t have perhaps the prettiest of posts today, but it is on one of my favourite subjects, colour. One of the joys of playing with embroidery is not just playing with threads, textures and shapes but also playing with colours. Machine embroidery threads come in a really dazzling array of choices and I will say I have been building up quite the collection, but it’s still never really enough…

In really excellent silk shading, or needlepainting as it is also aptly known, achieving very realistic effects just means blending loads of colours and placements of straight stitches to make visual magic happen. Embroidery machines aren’t really nearly as intelligent as hand embroiderers – all they can do is make straight stitch after straight stitch. However, that’s just what you need to emulate this fantastic style of embroidery.
One of the challenges with machine is that things that can feel very intuitive and straightforward by hand (I tend to ‘paint as I go’ when silk shading and make a lot of adjustments on the fly) can be very challenging on the machine. What I wanted to do then was to have a look at how layering different colours would look and what types of shading and effects I could create. I had seen while using the Wilcom Embroidery Studio that this had very sophisticated automated ways to create ombre effects with quite complex colour schemes.
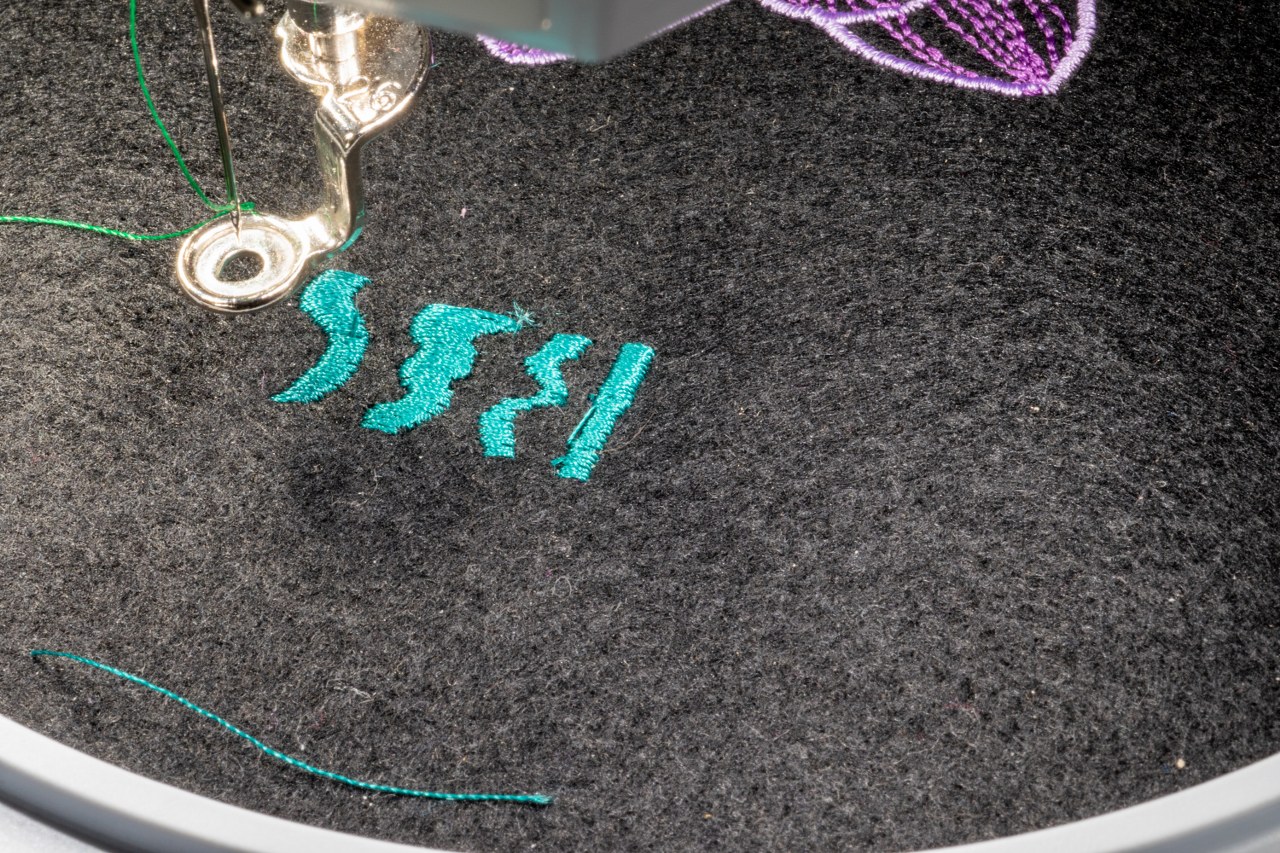
Sadly, Hatch doesn’t have anything quite so sophisticated and can only deal with automatically planning gradients between two colours. So, what I did was create a variety of test shapes, both some simple bars and some more complex shapes, where I could layer colours to see how the relative densities, fill types etc. would interact with each other.

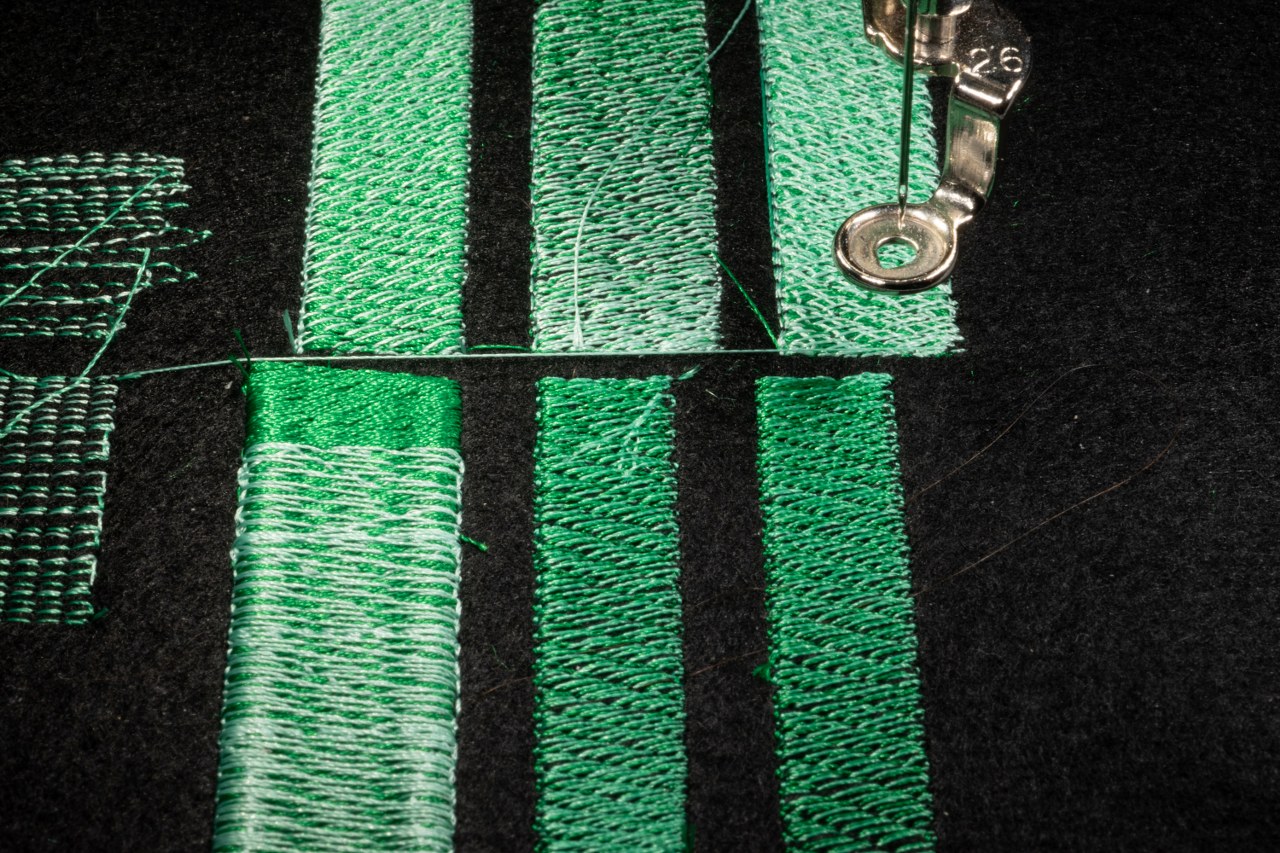
You can see from the small raggedly doodles that the underneath layer needs to be really quite thick to not get gapping in the bottom layer which is really one of my pet hates when doing filled areas. It is also very challenging to get two quite different colours to ‘blend’ over very small areas. This would have been a very challenging combo of colours by hand anyway but it’s interesting to compare how much the top layer sinks as well. I always remember one RSN teacher saying they think long and short stitch should be renamed long and longer stitch because, at least in my experience, you really always need to make the stitches longer than you think to get them in the right place in the end. The machine tension is adjustable but often you are relying on automated settings, and it does seem to be relatively aggressive compared to even my ‘strangle the fabric’ layers of tension by hand.

I played around with some different tatami fills on two more sensible colour combos, as well as Hatch’s automated gradient tools. It doesn’t do a bad job, but again, the stitch density is lacking from what I’d like. This is an easy fix in the software though. I also enjoyed trying to tune the density by hand. I haven’t found a way to make blocks of stitching not look like blocks because I was digitising in sections, but I’m sure with a bit more faffing I’ll get there.
While I was playing around, I thought I’d also let the machine get a good workout on this lovely three-colour feather. It’s a gorgeous piece of free-standing lace… and a good lesson in why good digitising is a blessing.
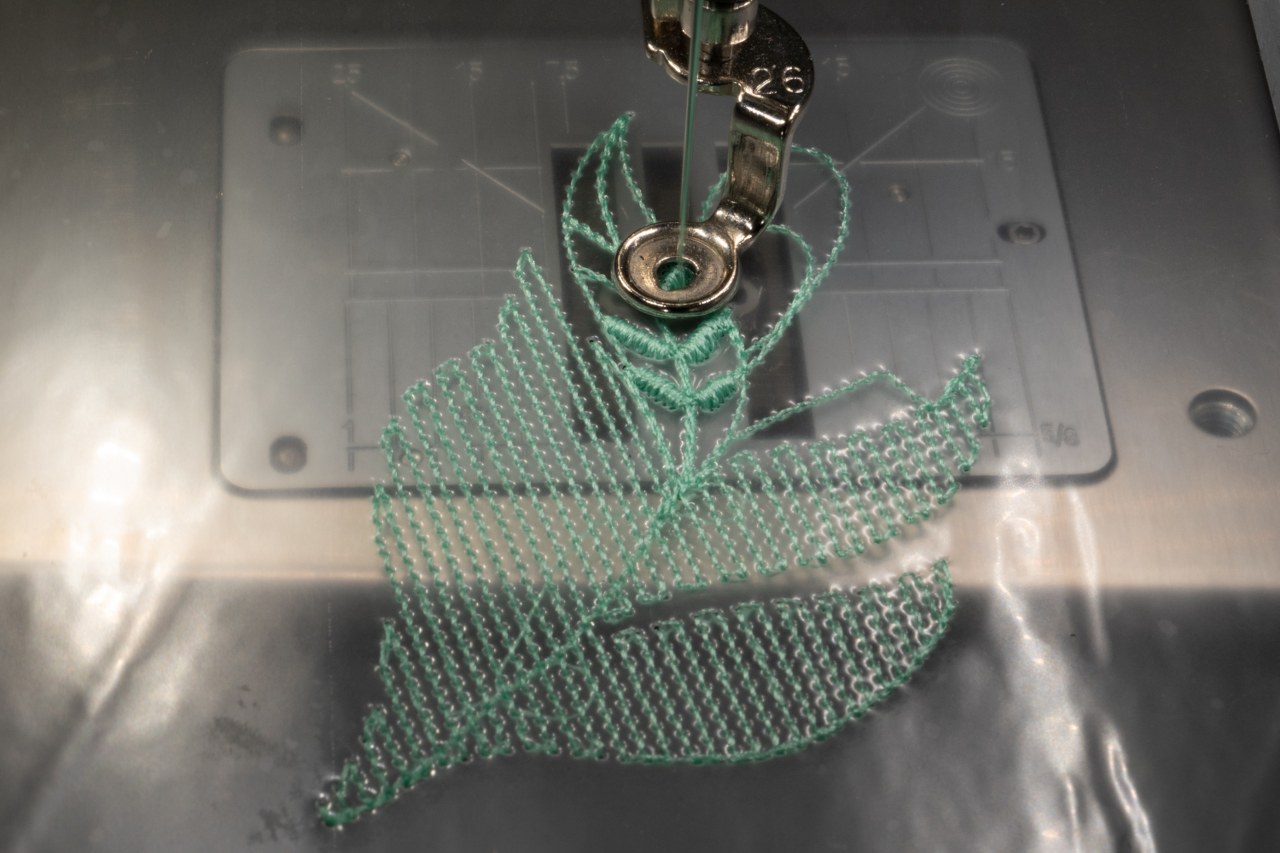
Most of the design ran out just fine on the machine but there was one horrible region that I didn’t quite make it to in time that managed to push something that was more like a tyrannosaurus rex nest than bird’s nest through the stitch plate. I hadn’t resized the design and it didn’t seem to have shifted in the hoop so I have no idea quite how a huge chunk of the thread managed to get pushed through the plate…
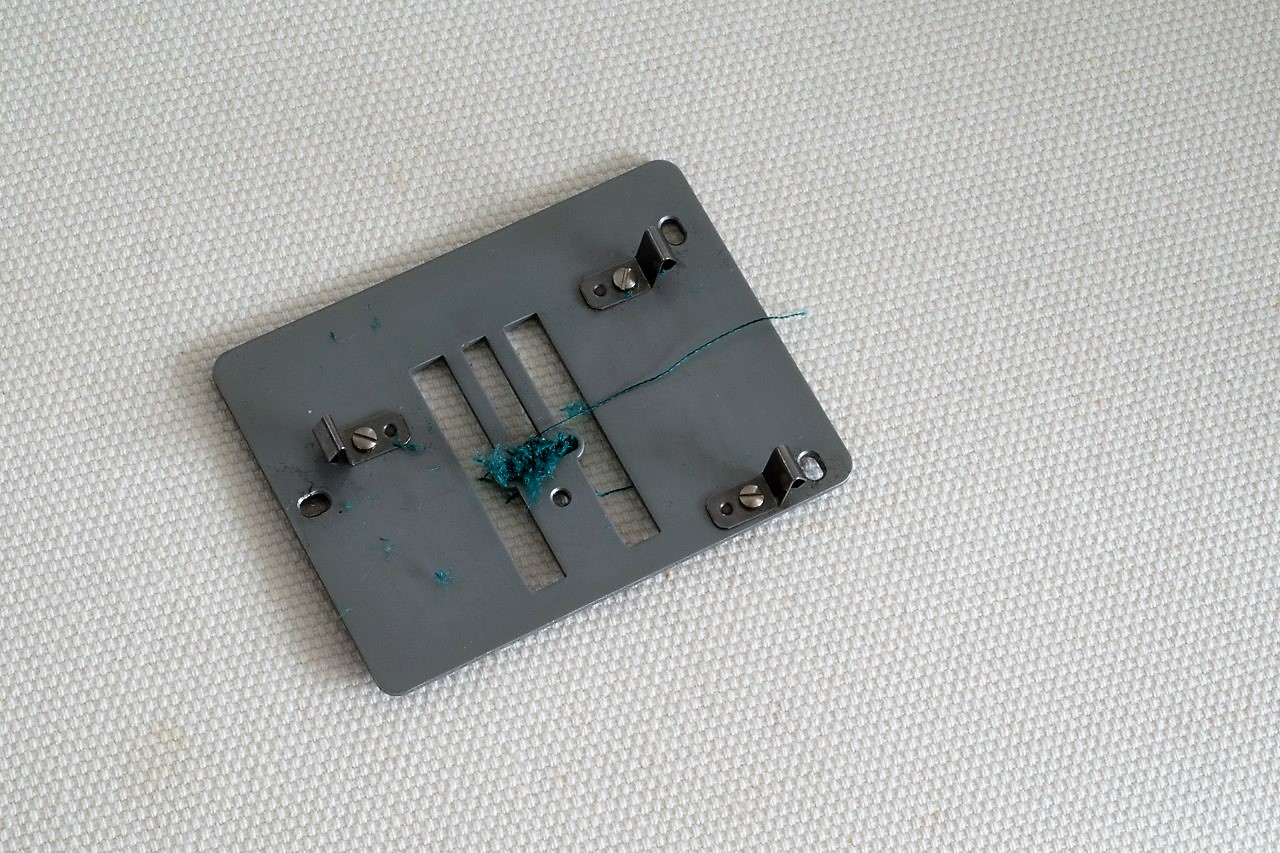
I was concerned at one point that I was going to have to burn this wedged chunk of thread as snips and scissors alone weren’t enough to make it through and it was thoroughly jammed but I did get there with some colourful language to match the colourful pieces in the end…
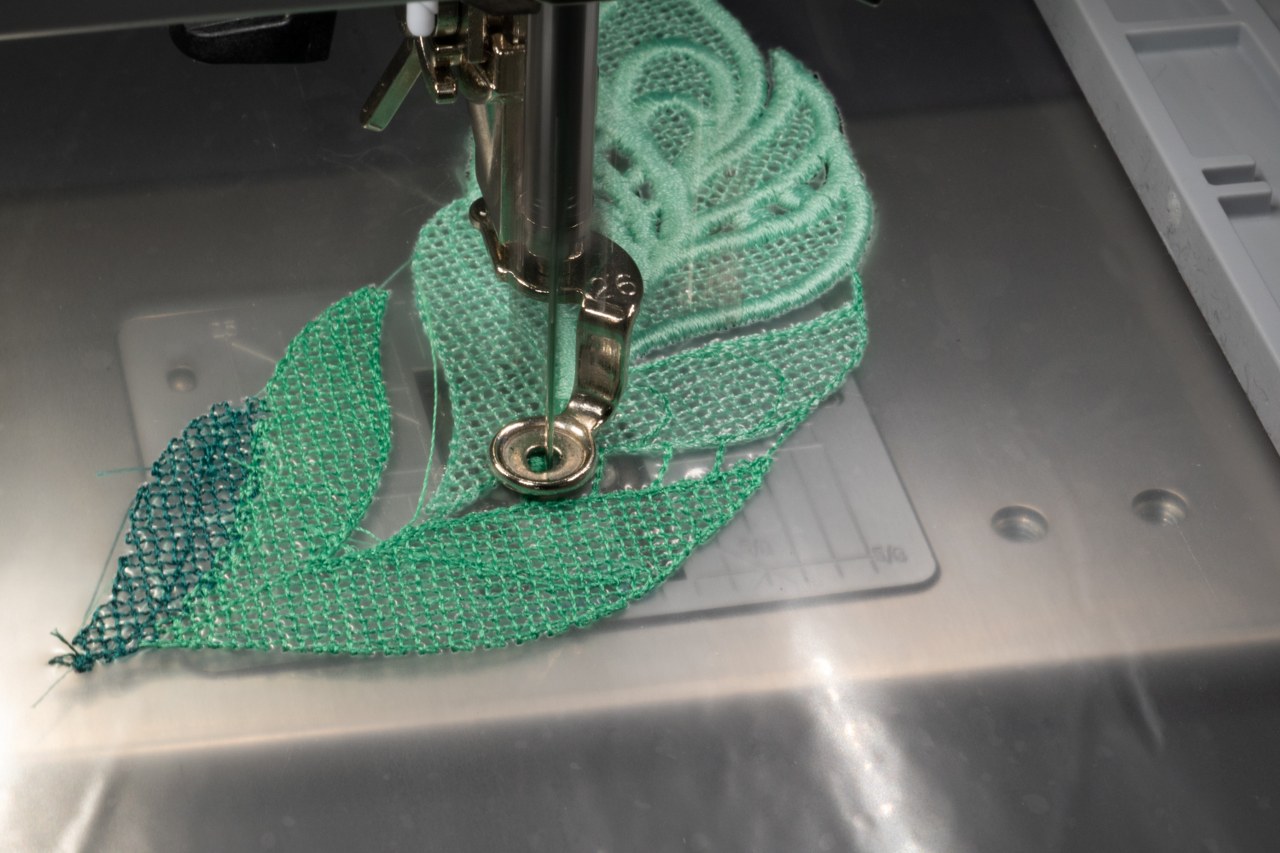
I did try rerunning the section but it was clear the stitch density was far too high, so I sealed off the ends with some thread glue and left it be to finish up the final few details. Really disappointing to see things go awry after many hours of stitching but I don’t think it ruins the overall effect too much.
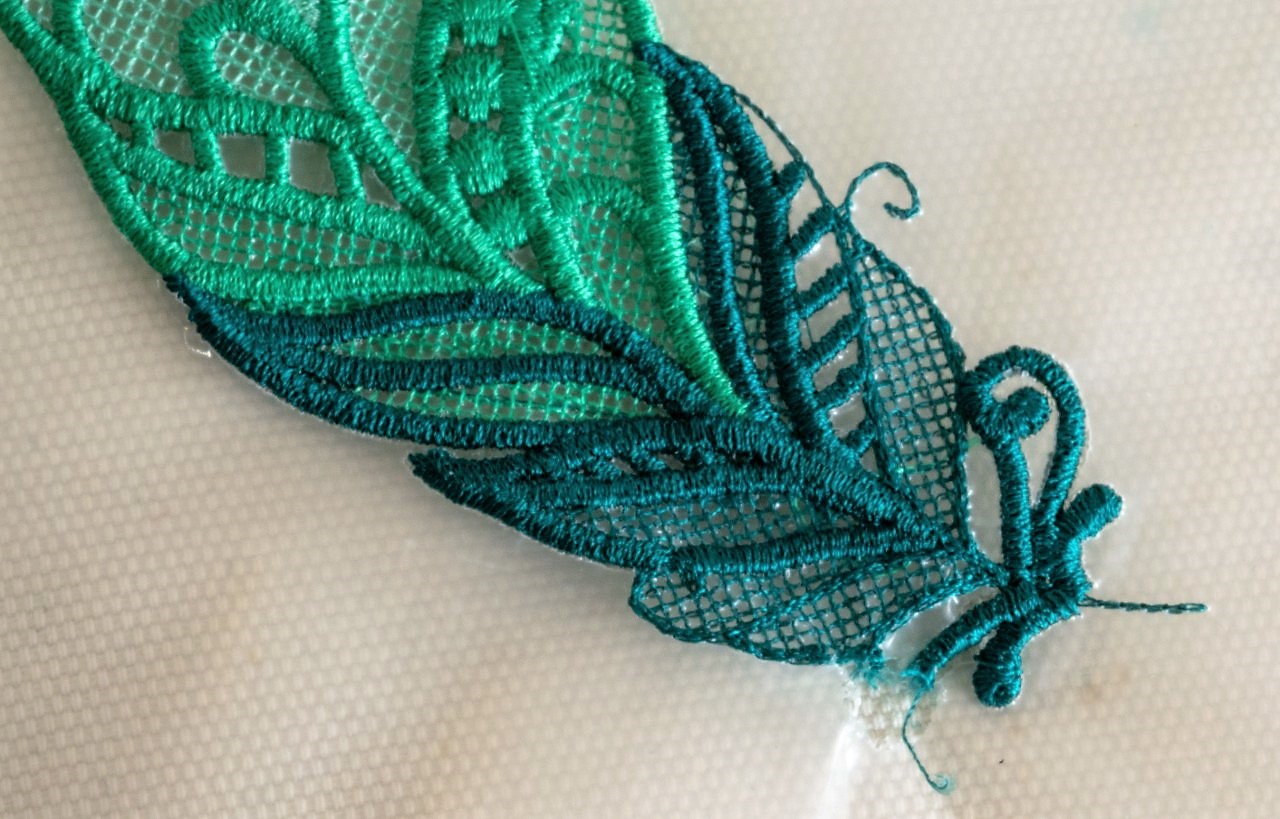
These were fun little experiments and I’m looking forward to making more complex pieces in the future and seeing what fun painting I can have!

Oh my goodness, that feather is just lovely! It’s interesting to hear about your experiments and what you do to work with the machine to achieve different effects 🙂
LikeLiked by 1 person
I love the colours so much!
LikeLiked by 1 person
I’d have never known there was an issue with that gorgeous feather! Loving the different densities of the filling stitches too.
LikeLiked by 1 person
It’s really interesting to see the different machine fills – I think with some of the tatami stitching it’s hard to see how you could do it by hand (or rather how you’d have the patience to do it by hand…)
LikeLike
A lovely feather. Of course I like the idea of multi-colour designs. The silk shading experiments look interesting too.
LikeLiked by 1 person
Hopefully some flashy rainbows soon to come!
LikeLiked by 1 person
Goodness, there are some interesting challenges in the blending, aren’t there! And you’ve played a blinder in recovering the feather – I can’t see where there might have been a problem at all!
LikeLiked by 1 person
Cheers, nothing that can’t be fixed with a good bit of thread glue! The blending is fun, I feel I need to get my head around it a bit more… and maybe buy more shades of thread…
LikeLiked by 1 person
That feather is amazing! Love the colors!
LikeLiked by 1 person